Web console overview
This guide provides an overview of the web console for administrators, including managing users, devices, networks, and more.
Introduction
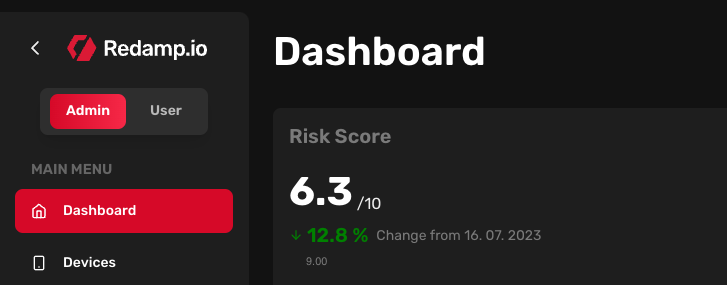
After logging into the web console with your company account (admin account), you'll be in the "admin" view by default. You can check your current view by looking at the top left corner of the web console under the "Redamp.io" logo. In this view (admin view), you can manage your company's users, devices, networks, and more.
If you switch to the "user" view, you can add your own devices. To add devices of your employees, switch back to the "admin" view and go to the "Users" page. More info on the [Importing Users](./Importing Users.mdx) page.
Dashboard
Risk score
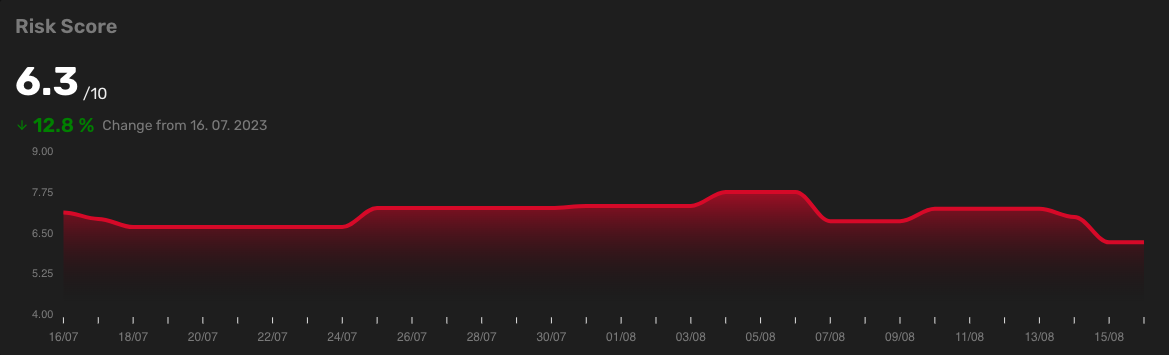
The risk score is a number between 0 and 10. The higher the risk score, the more vulnerable your company is. It is calculated as an average from the latest scans of all devices from your company.
On this chart, you can see your company's risk score for the last 30 days. Below the risk score, you can observe the percentage change in the risk score over the past 30 days.
Platform stats
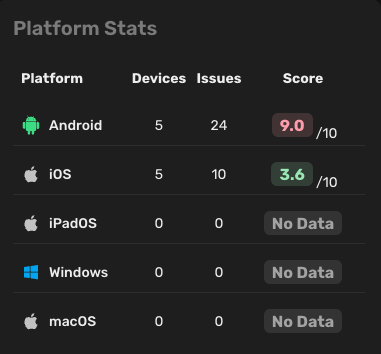
In this list, you can see the number of devices, issues, and the average risk score for each platform.
Issue history
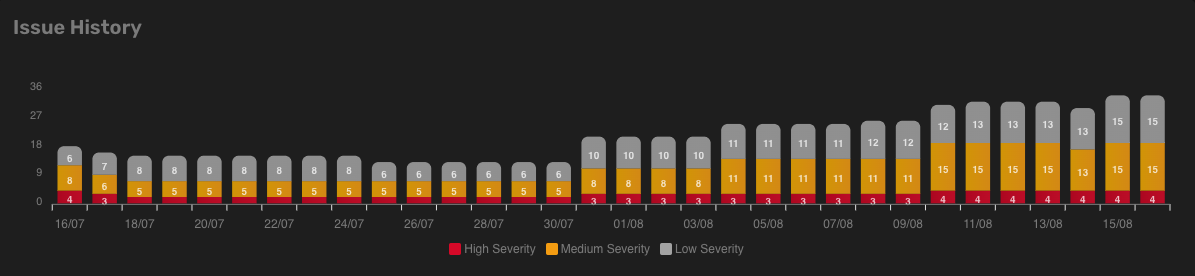
In this chart, you can see the evolution of the number of issues in the last 30 days. Each bar represents a day and is divided into three sections indicating low, medium, and high severity.
Current issues
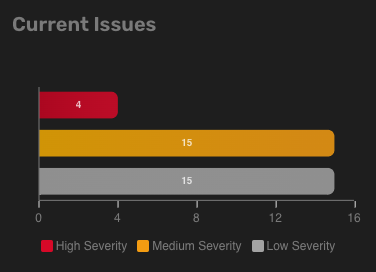
This chart displays the number of issues for each severity level on the current day.
Issues
This table displays all issues from your company. You can filter issues by severity, platform, manufacturer, or device model. By default, the table is sorted by severity (from high to low).
Each issue is assigned a severity level (low, medium, high), a number of affected devices, a platform (Android, iOS, etc.), a title, and a description.
Clicking on the issue title allows you to access more details and a suggested solution to address the specific problem.
Devices
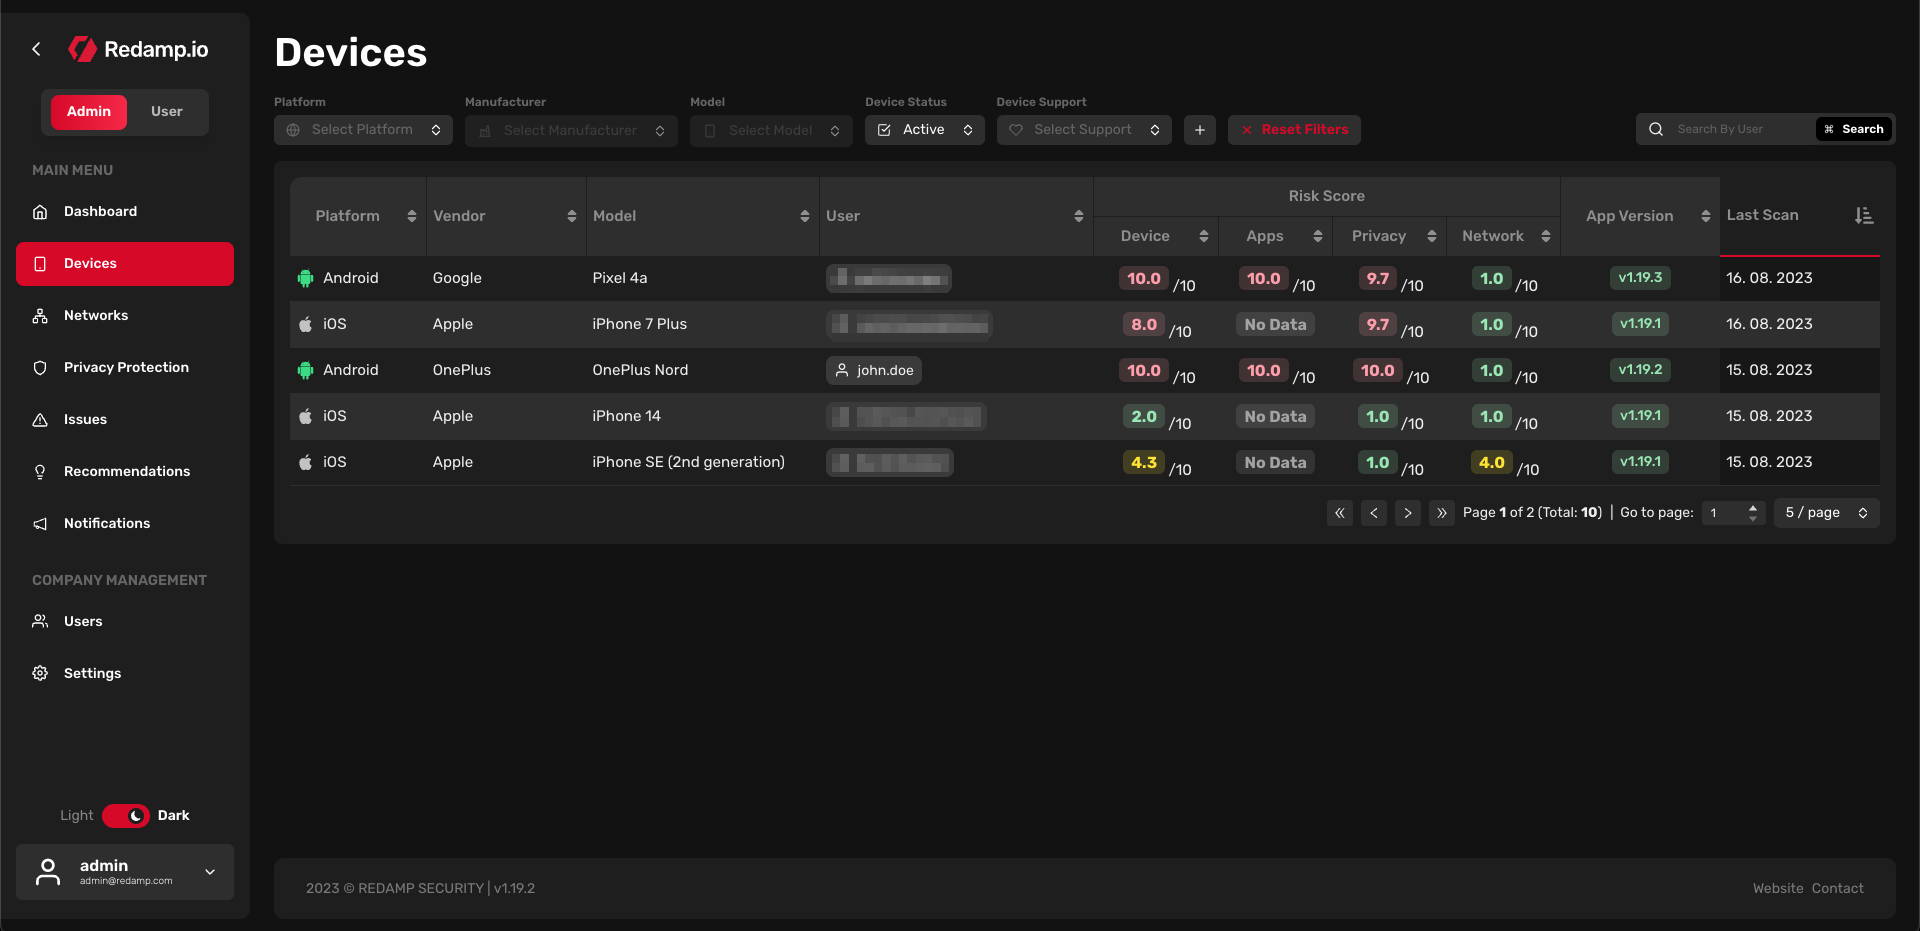
In this table, you can see all devices from your company that have been scanned at least once. By default, the table is sorted by risk score (from high to low). You can filter devices by:
- Platform: Android, iOS, iPadOS, macOS, Windows, or Linux
- Manufacturer: Samsung, Huawei, Xiaomi, Apple, etc.
- Model: Galaxy S10, iPhone 11, etc.
- Device status: - Active: The device is active and can be scanned. - Archived: The device is inactive and cannot undergo scanning. Devices are automatically archived after 30 days without a scan.
- Device support: - Supported: The manufacturer provides security updates for the device. - Unsupported: The manufacturer no longer provides security updates for the device. - Unknown: We are not able to determine if the manufacturer provides security updates for the device.
- Last scan: The range of dates for the last scan of the device.
- Updated sensor: - Updated: The device has the latest version of the sensor installed. - Not Updated: The device does not have the latest version of the sensor installed.
Each device is assigned a risk score, a platform (Android, iOS, etc.), a manufacturer, a model, a set of risk scores divided into four categories (device, apps, privacy, and network), a Redamp.io mobile app version, and a last scan date. If the "App Version" is in red, it means that the device does not have the latest version of the Redamp.io mobile app installed.
Each device performs a scan every 24 hours (by default, this can be changed in "Settings"). The scan is conducted by the Redamp.io mobile app installed on the device. If a device fails to perform a scan for more than 30 days, it will be automatically archived. Before this occurs, the device will receive several notifications prompting it to perform a scan.
Clicking on the device name allows you to access more details about the device.
Networks
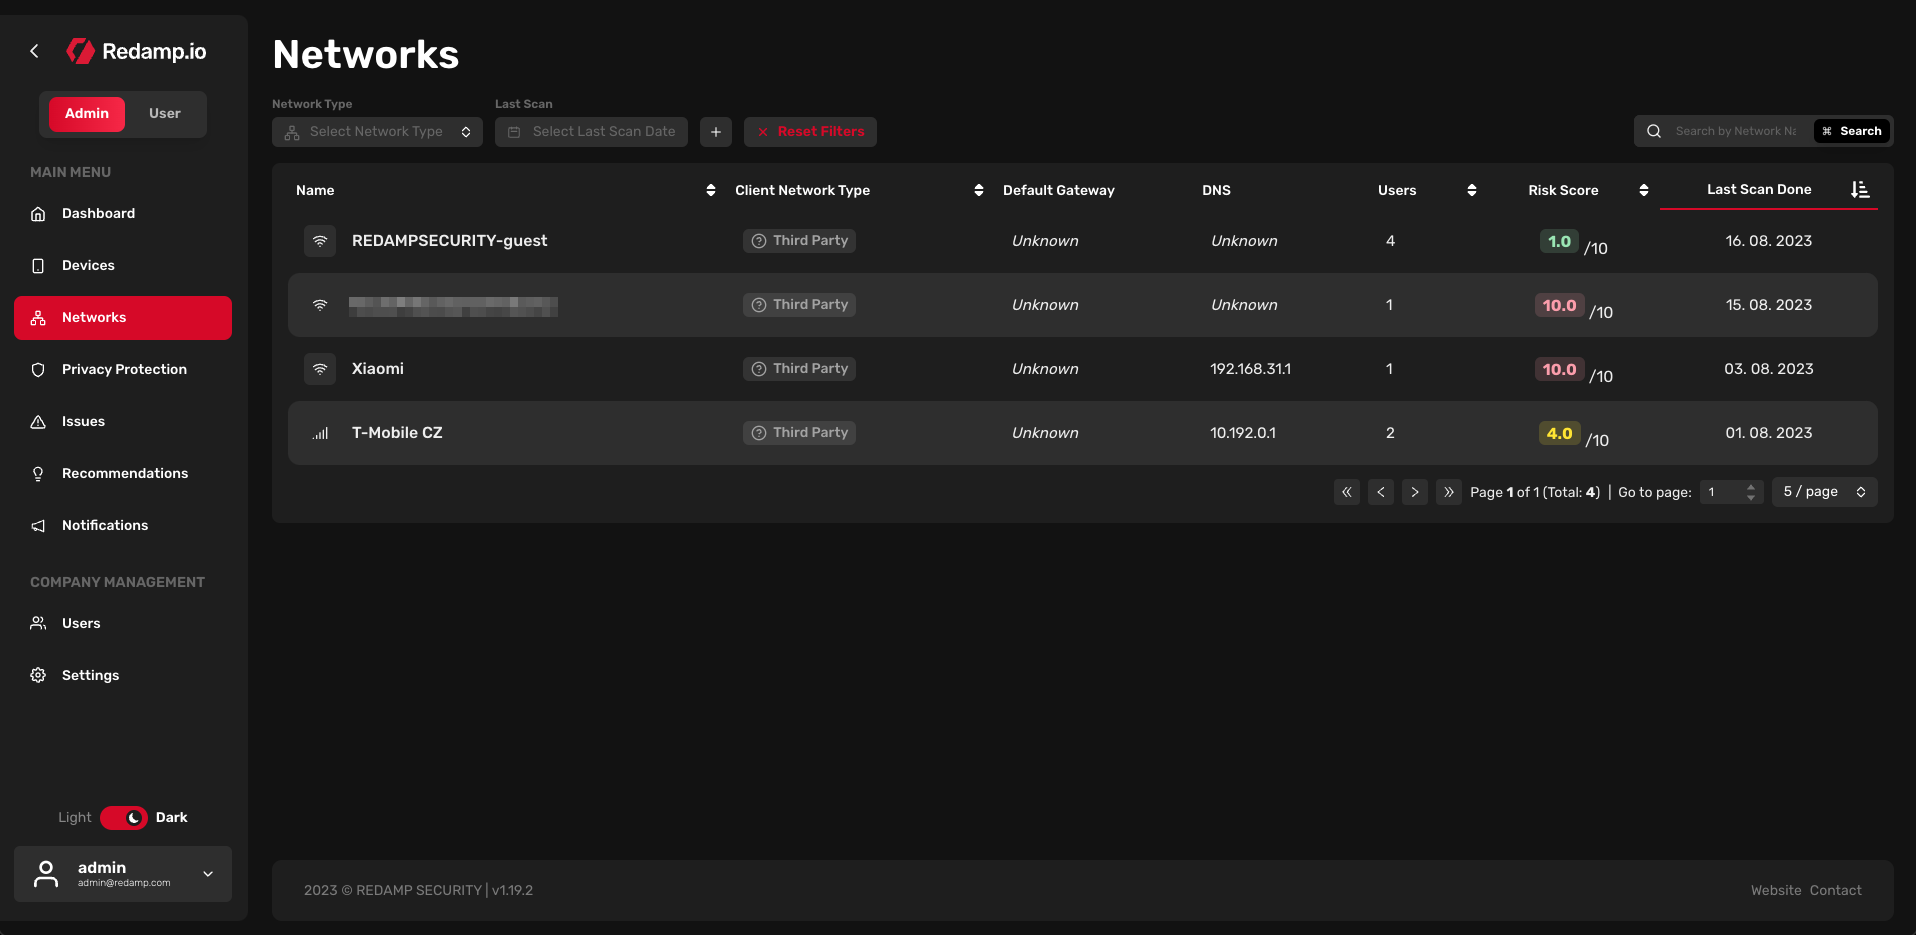
In this table, you can see all networks from your company. By default, the table is sorted by risk score (from high to low). You can filter networks by:
- Network type: Wi-Fi, Cellular, or Ethernet
- Last scan: The range of dates for the last scan of the network.
- Client network type: Office, Remote Office, or Third Party
Each network is assigned a network type (Wi-Fi, Cellular, or Ethernet) which is indicated by an icon before the network's name, a client network type (Office, Remote Office, or Third Party), a default gateway, a DNS, number of users who scanned this network, a risk score, a set of risk scores divided into four categories (device, apps, privacy, and network), and a last scan date.
Client Network Type is a custom field that can be set by the administrator (you have to click on the specific network and then click on the "Network Settings" button). By default, all networks are set to Third Party after the first scan.
Privacy Protection
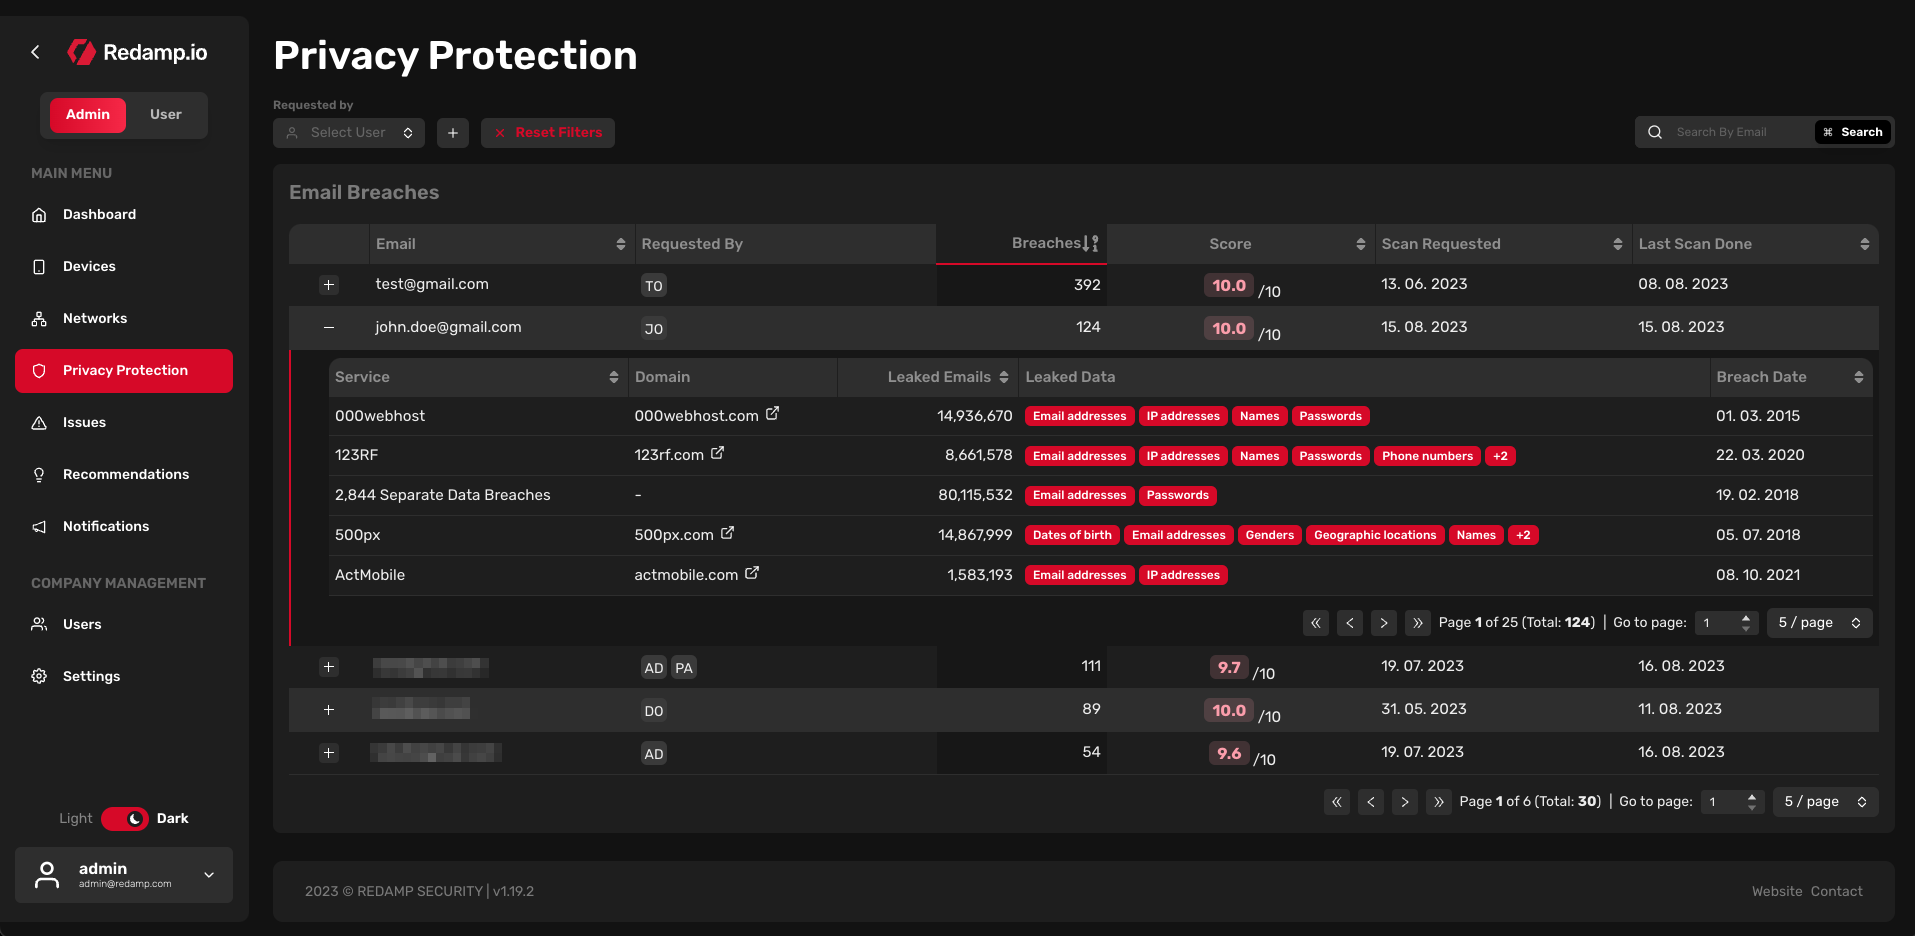
In this table, you can see all privacy protection settings from your company. By default, the table is sorted by breaches (from high to low). You can filter privacy protection settings by:
- Requested by: Filter requests by users
Each email breach is assigned an email address, the user who requested the email, a number of breaches, a risk score (calculated from the number and severity of breaches), a date when the email was first requested, and a date when the email was last scanned.
When you import a user, the user's email is automatically scanned for data breaches. The user is then notified about the results of the scan. If the user wants to scan another email, they can request it in the Redamp.io mobile app. The user can request up to 5 emails.
Issues
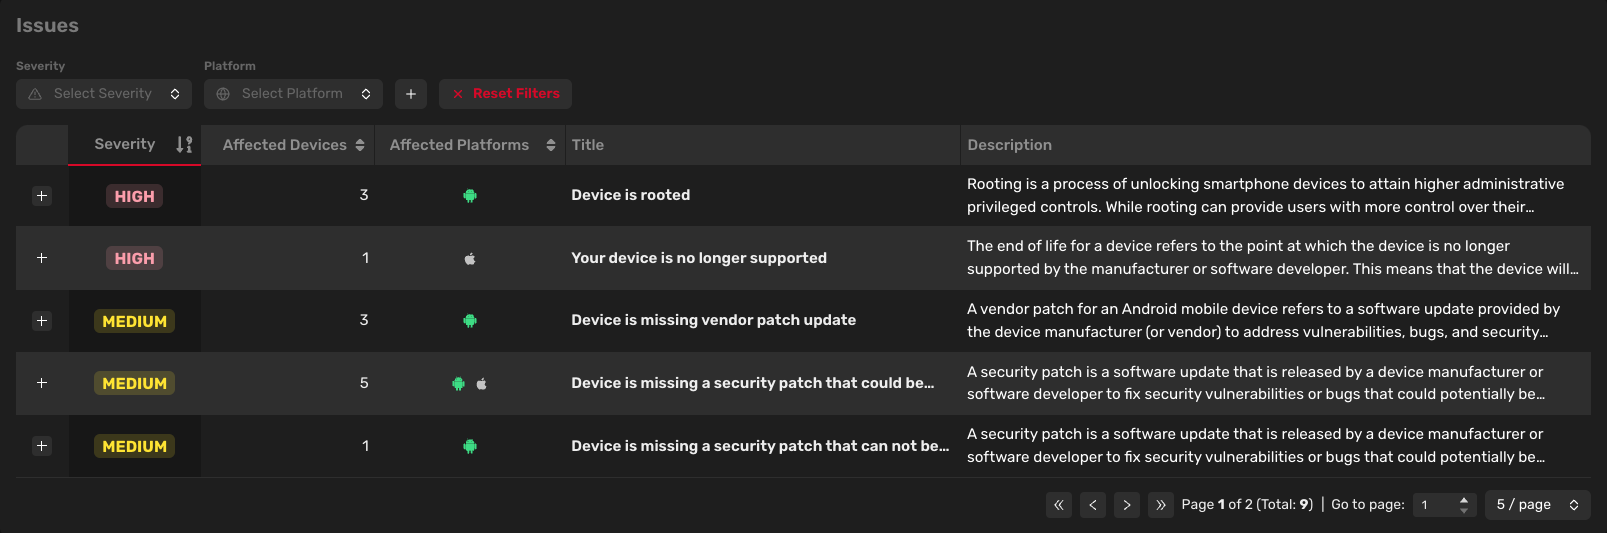
Basic Issues
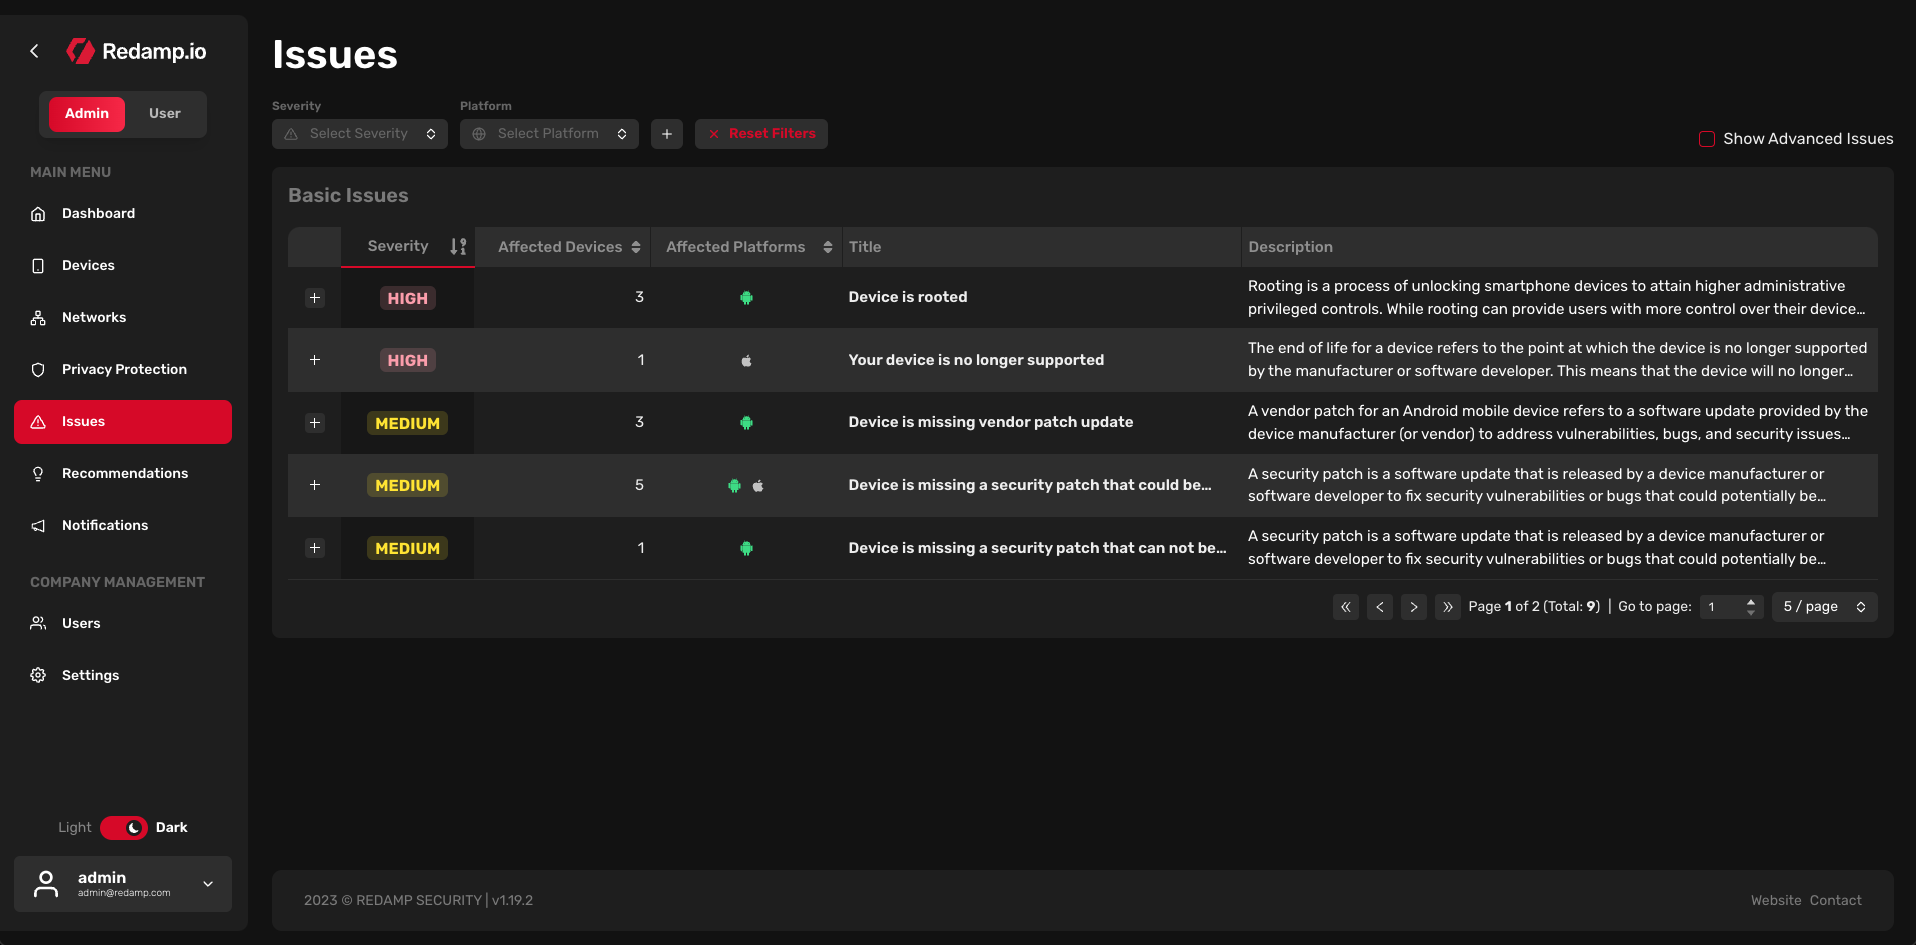
In this table, you can see all issues from your company. By default, the table is sorted by severity (from high to low). You can filter issues by:
- Severity: Low, Medium, or High
- Platform: Android, iOS, iPadOS, macOS, Windows, or Linux
- Manufacturer: Samsung, Huawei, Xiaomi, Apple, etc.
- Model: Galaxy S23, iPhone 14, etc.
Each issue is assigned a severity (Low, Medium, or High), a number of affected devices, a number of affected platforms, a title of the issue, and a description of the issue.
Clicking on the "plus" icon at the beginning of every row allows you to access more details about the issue. In the details, you can see a list of affected devices, a detailed description, a list of affected platforms, and a suggested solution for resolving the issue.
Advanced Issues
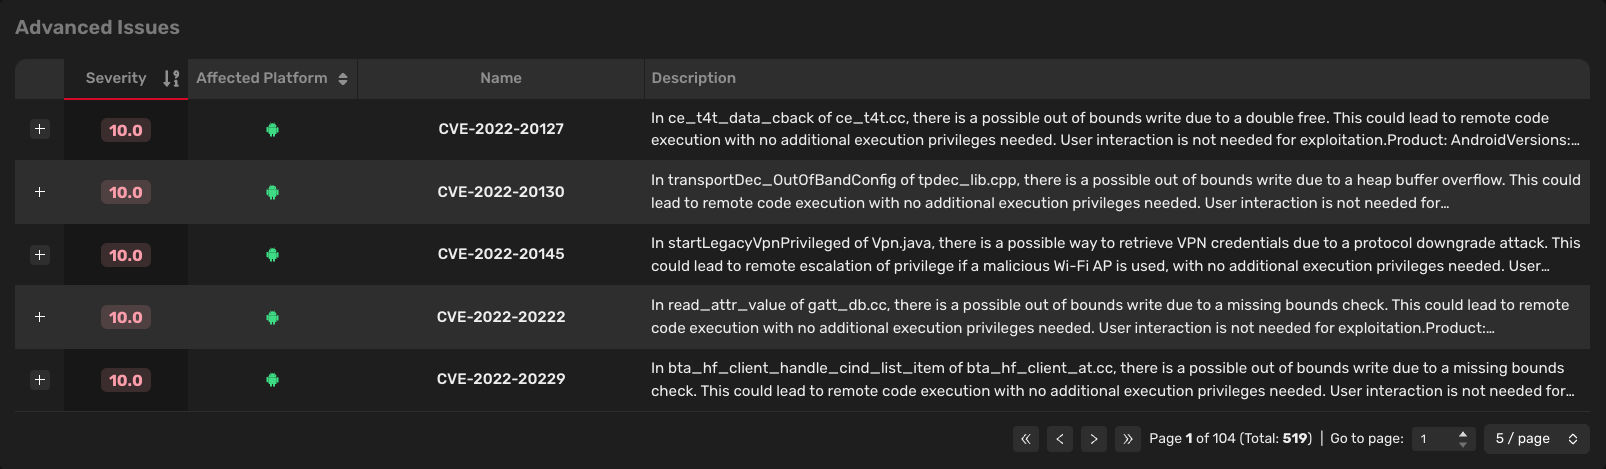
In the top right corner of the "Issues" page, you can see a button called "Show Advanced Issues". Clicking on this button will show you a table with advanced issues.
Advanced issues are CVEs (Common Vulnerabilities and Exposures) that are assigned a CVE ID. CVEs are publicly known vulnerabilities and are assigned by the CVE Numbering Authority (CNA) and are used to uniquely identify a specific vulnerability or exposure. These vulnerabilities or exposures are then assigned a severity score (CVSS score) that is used to determine the severity of the vulnerability or exposure.
Each advanced issue is assigned a severity score (based on the CVSS score), a list of affected platforms, a CVE ID, and a CVE description.
Clicking on the "plus" icon at the beginning of every row allows you to access more details about the advanced issue. In the details, you can see a list of affected devices, a detailed description, and a suggested solution for resolving the advanced issue.
Recommendations
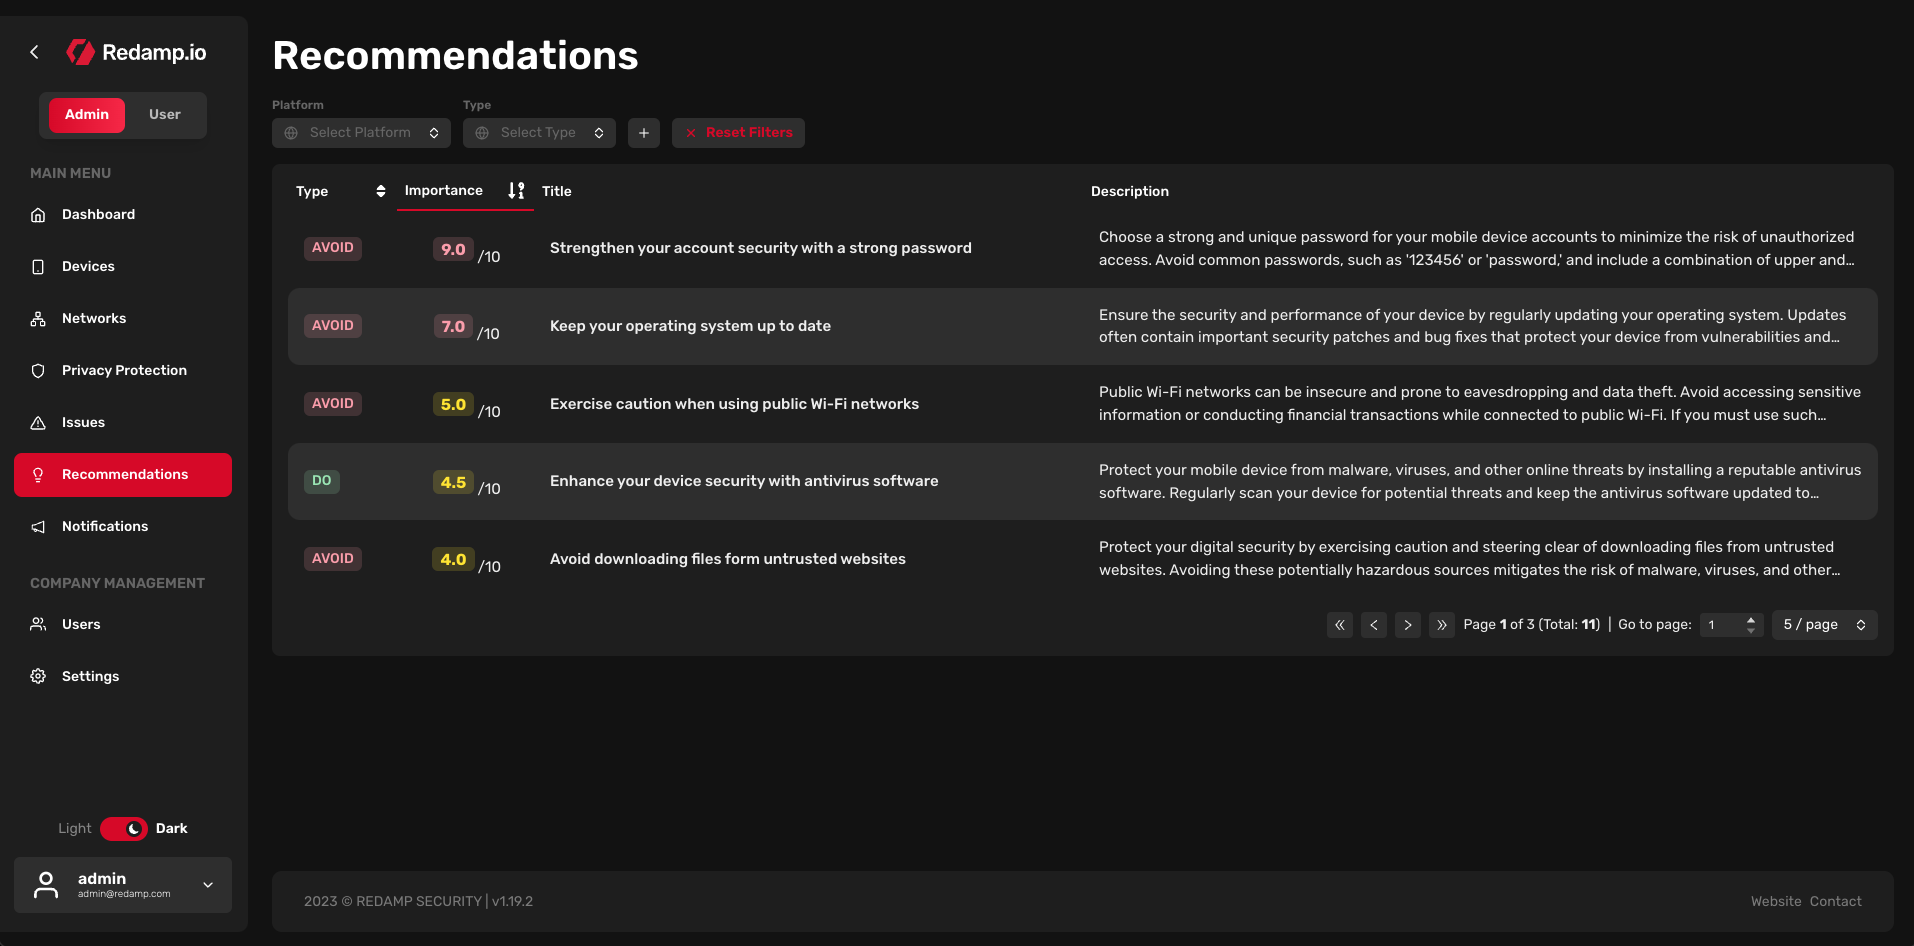
Recommendations are basic security suggestions that it is good to follow, do, or avoid.
Each recommendation is assigned:
- Type: Avoid (good to avoid), Do (good practice)
- Importance: Represented by a score
- Title: Recommendation in a few words
- Description: Detailed description of the recommendation
Notifications
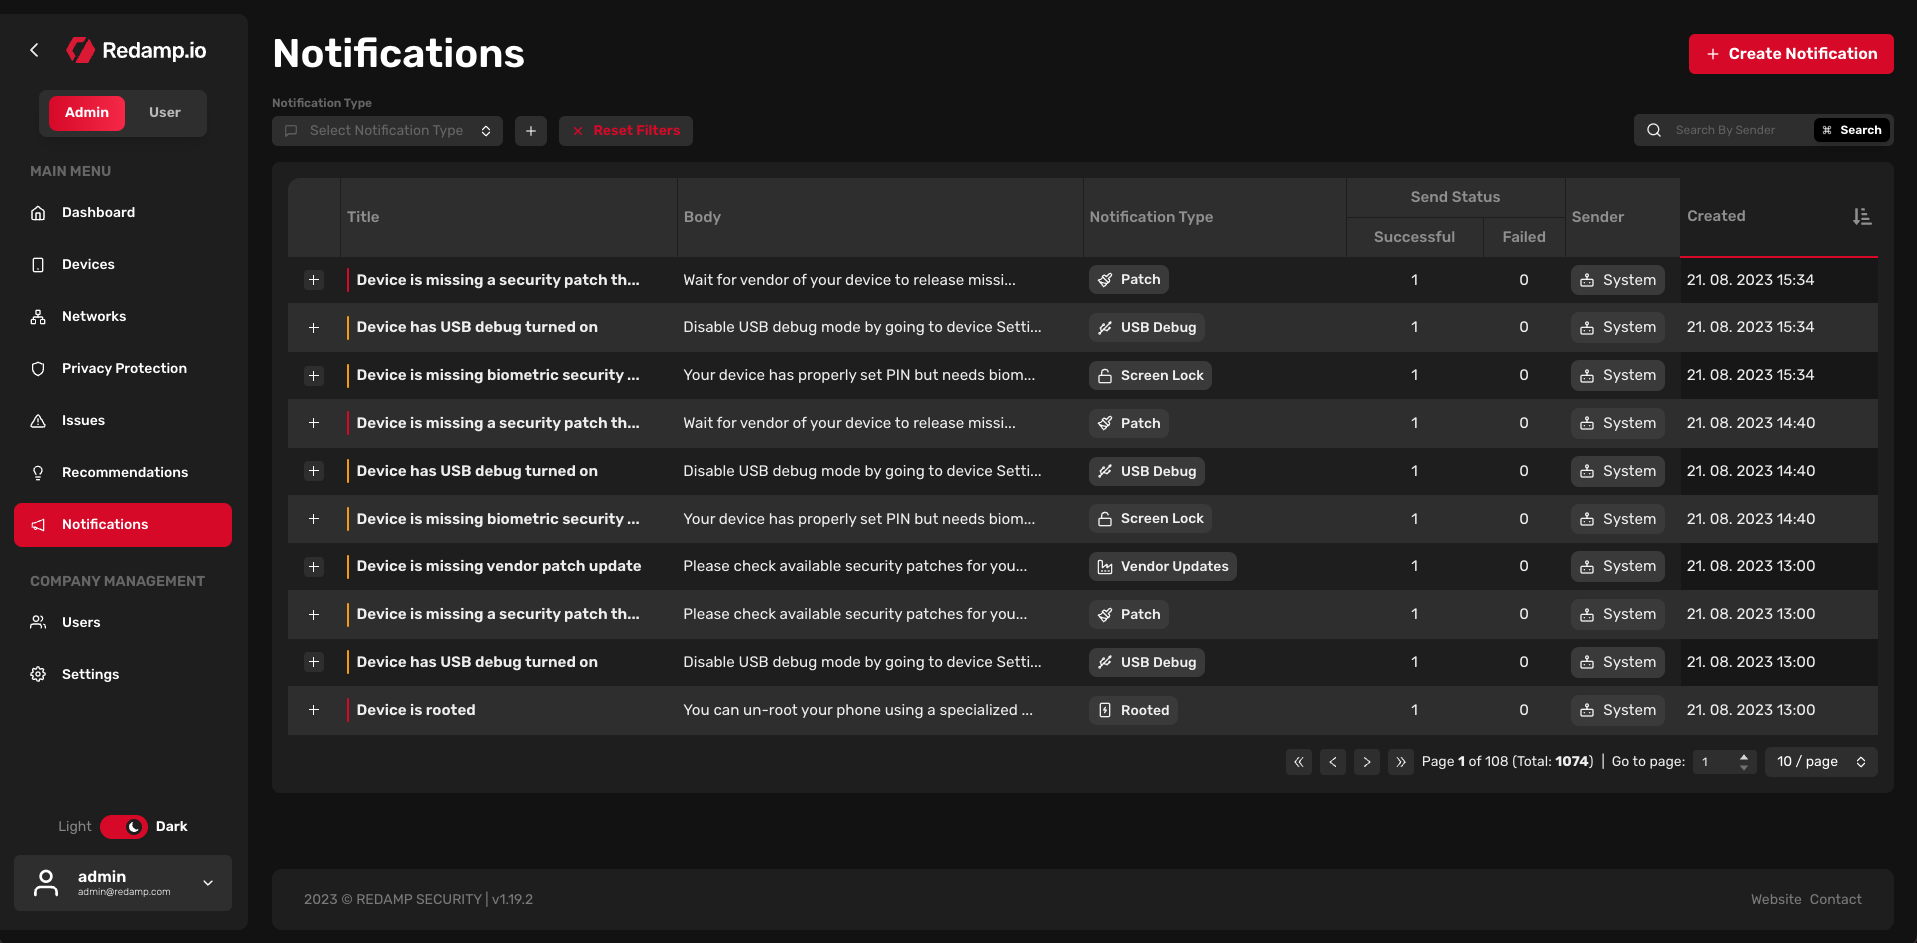
In this table, you can see all notifications that were sent to all devices added to your company account. These notifications are sent when a new issue is detected, when a new email breach occurs, or when our system decides to send another important notification.
You can also send your own notification. To do this, click on the "Create Notification" button in the top right corner of the "Notifications" page. You can then choose to which devices you want to send the notification and what the title of the notification will be.
By default, the table is sorted by date (from new to old). You can filter notifications by:
- Notification type: - Threats Info: Informing about all threats, it's sent after every scan - Patch: Informing about the missing security patch on the device - Vendor updates: Vendor released a new security update for the device - OS end of life: Informing about the end of support for the OS on the device - Device end of life: Informing about the end of support for the device - Rooted: Informing that the device is rooted (only for Android) - Jailbroken: Informing that the device is jailbroken (only for iOS) - Screen lock: Informing about the type of screen lock on the device (PIN, Fingerprint, FaceID, ...) - Bluetooth: Informing about the Bluetooth status - USB Debug: Informing if there's USB debug turned on (only for Android) - General recommendation: Our system is sending security tips on a regular basis - Custom notification: You can send your own notification to the devices - Background scan request: Request for doing a background scan - New security patch: Informing about new available patch from OS vendor - Email Scan: Informing about finished scan of the email address
- Sender: Sender of the notification (user or system)
- Send status: Status of the notification (successfully sent or failed)
- Recipient: Recipient of the notification
- Severity: Severity of the notification (Low, Medium, or High)
- Created: When the notification was sent
Each notification is assigned a severity (represented by a tiny line at the beginning of the row), a title, a body, a notification type, a number of failed and successful sends, a sender, and a date when the notification was sent.
Clicking on the "plus" icon at the beginning of every row allows you to access more details about the notification. In the details, you can see a list of recipients.
Users
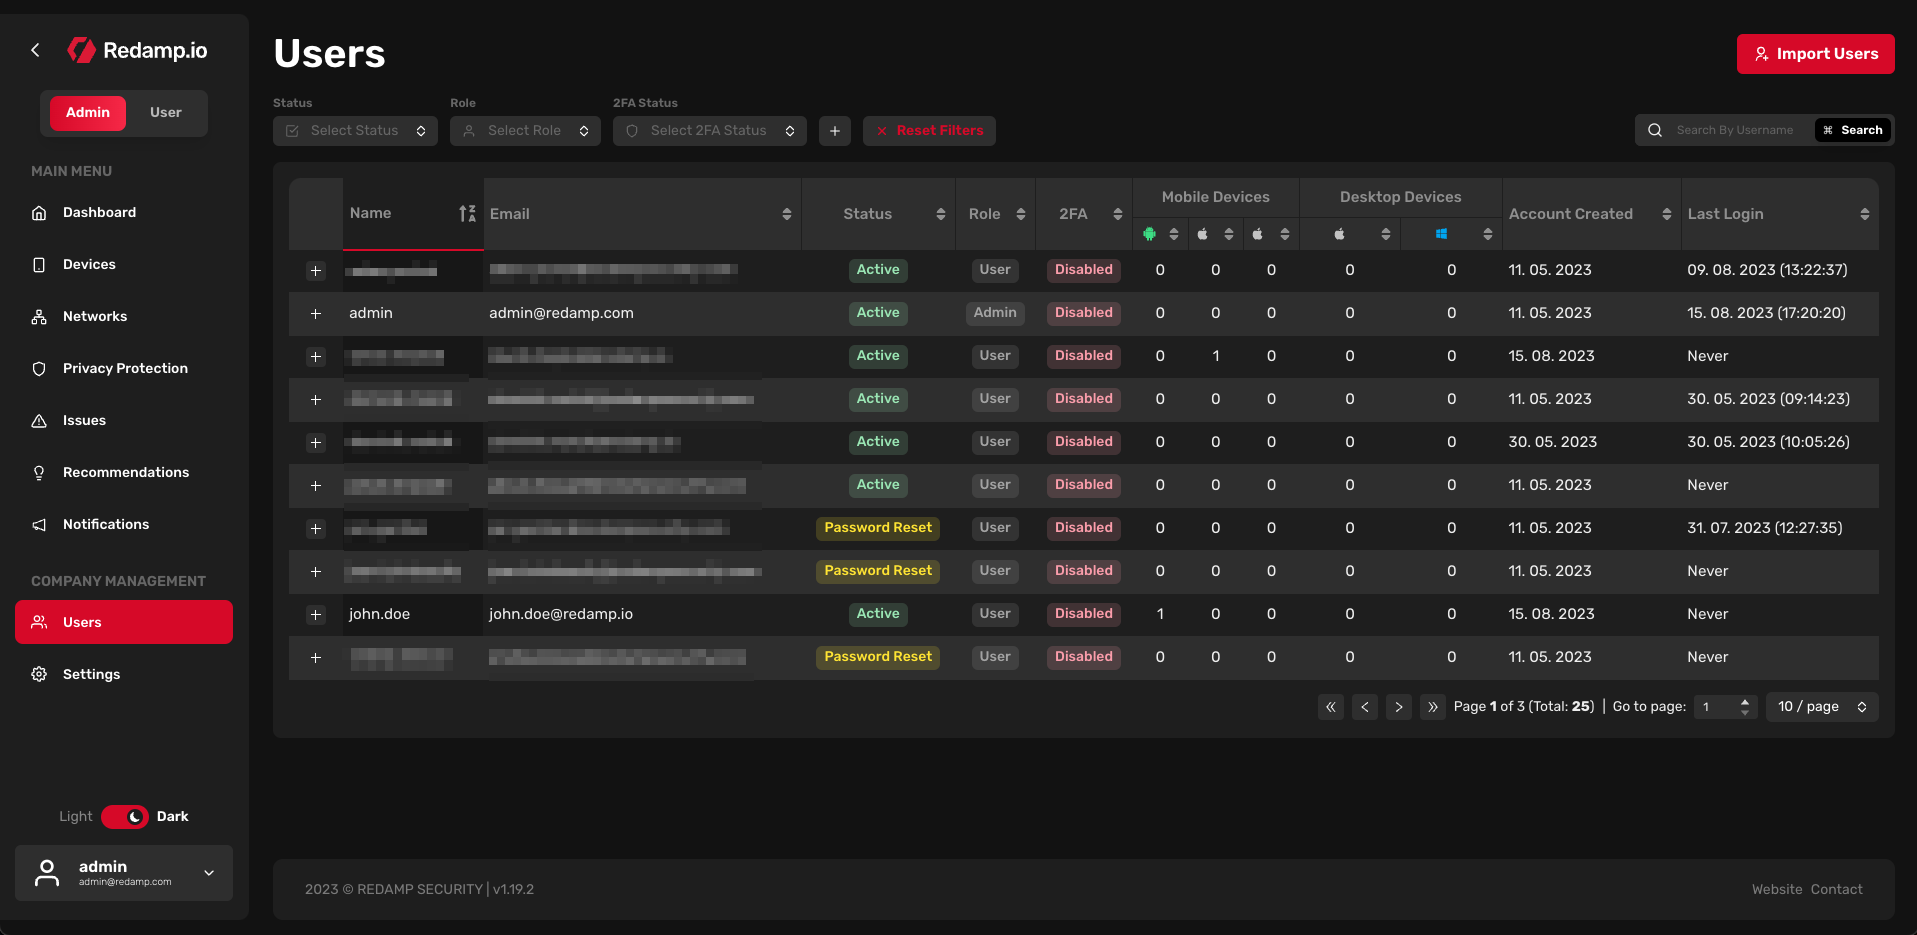
In this table, you can see all users that are added to your company account. You can filter users by:
- Status: User status - Active: The user set up their account and is using the app - Pending: The user has been invited to the company account, but has not yet set up their account - Password Reset: The user has requested a password reset. - Archived: The user has been archived and can no longer access the company account or make a new scan
- Role: User role - User: The basic type of account - Admin: Administrator of the whole company
- 2FA Status: Two-factor Authentication status (enabled or disabled)
- Account created: When the account was created
- Last login: When the account last logged in
Each user is assigned a username, an email, a status, a role, a 2FA status, a number of devices, a date when the account was created, and a date when the account last logged in.
Clicking on the "plus" icon at the beginning of every row allows you to access the list of devices that are assigned to the user. You can also click on the row to access more details or manage the user.
Settings
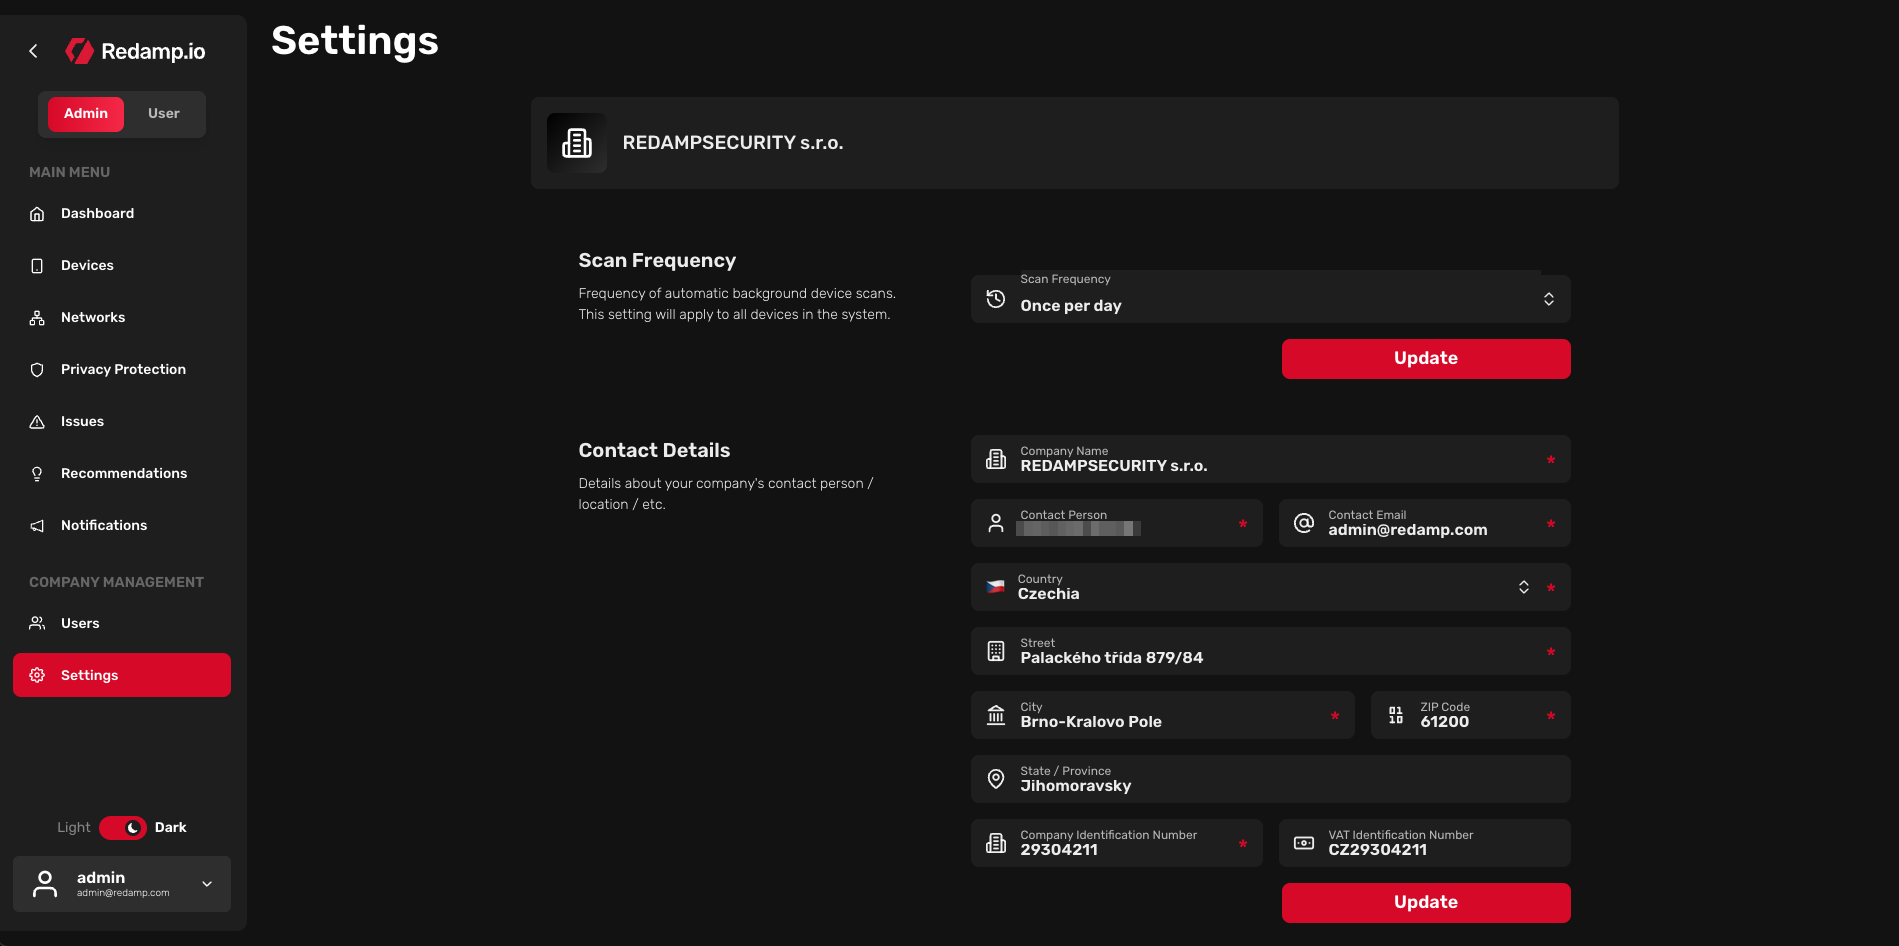
In the "Settings" section, you can manage your company account. You can set the scan frequency (frequency of automatic background device scans) or change the company contact details.
By default, the scan frequency is set to "Once per day". This means that every device will be scanned once a day.