Creating your own phishing templates
A step-by-step guide to building a custom phishing simulation from an email template, a target page, and the phishing template that connects them, including the full variable reference.
Overview
A phishing simulation is assembled from three building blocks. You create them in the Manage templates screen (Education → Phishing simulations → Manage templates), on three separate tabs:
- Email template - the message the recipient receives (subject + HTML body).
- Target site (landing page) - the page the recipient is taken to after clicking the link in the email.
- Phishing template - the reusable combination of an email template, a target page, and a sending profile that a campaign actually uses.
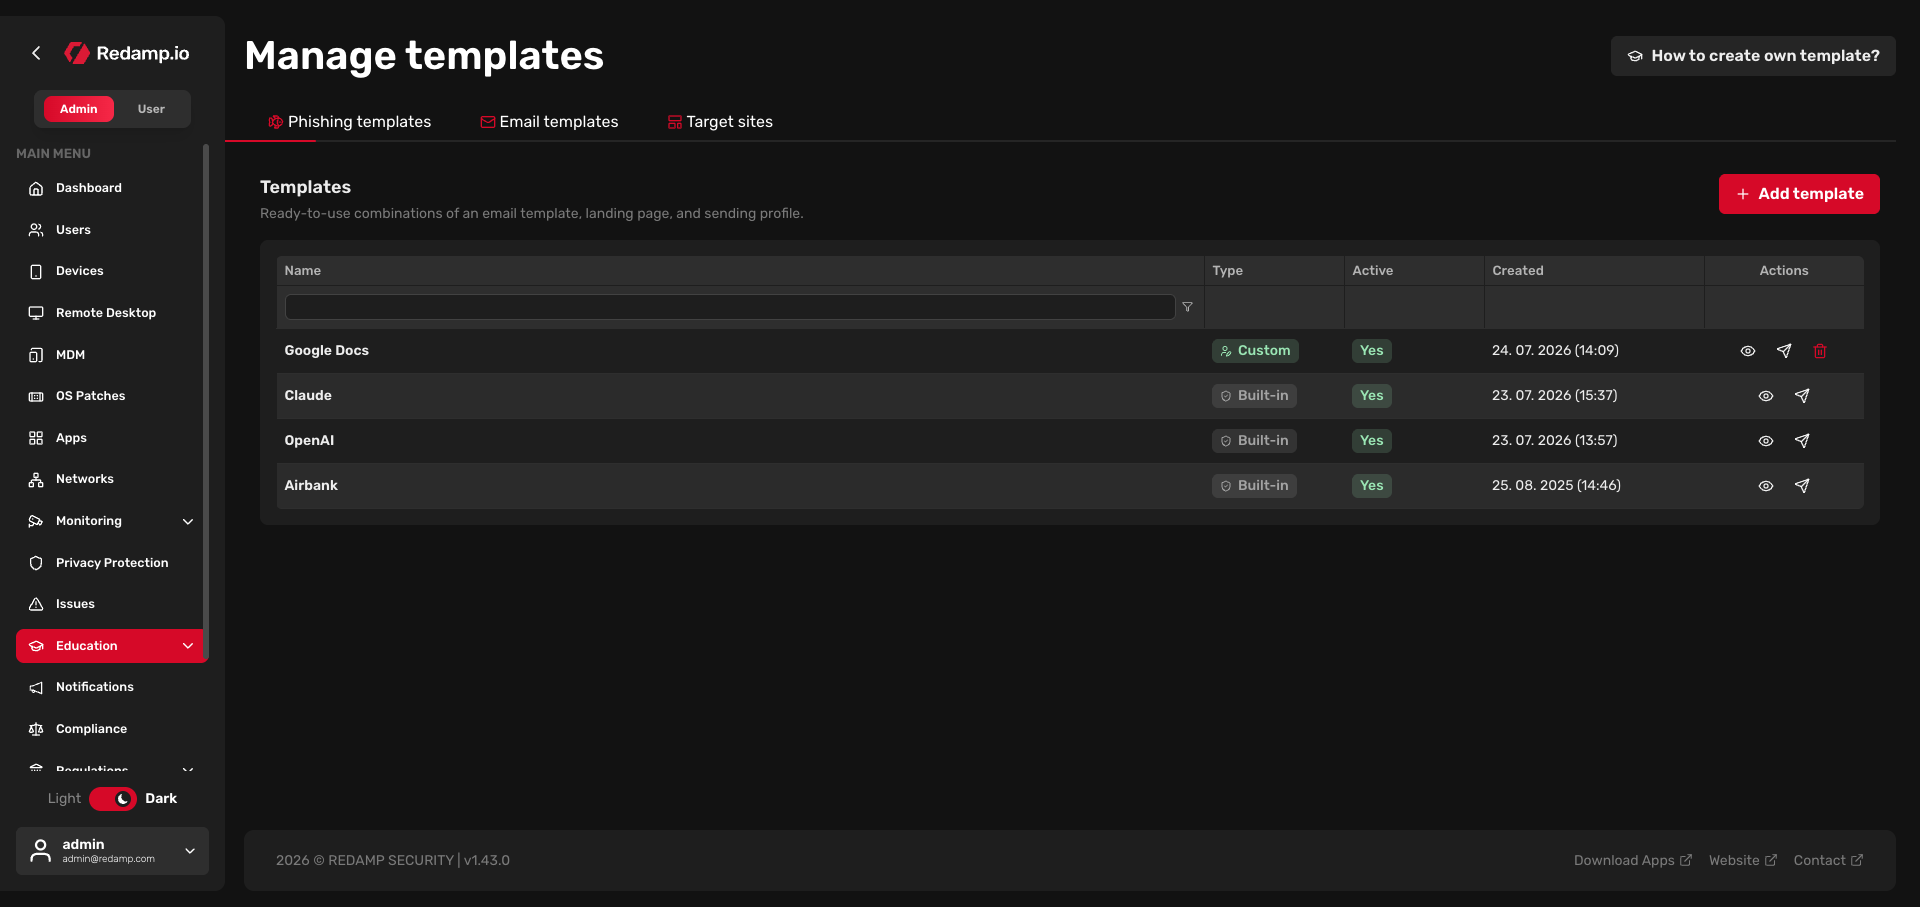
Because each block references the one before it, build them in this order:
- Create the email template.
- Create the target site.
- Connect both into a phishing template.
Tip: If you just want to try a simulation quickly, you can use one of the Built-in templates that ship with Redamp.io. The steps below are for when you want your own Custom content.
What are variables?
Phishing templates use variables - placeholders written as {{.Name}} that Redamp.io replaces with real, per-recipient values the moment an email is sent. For example, {{.FirstName}} becomes each recipient's actual first name, and {{.URL}} becomes the unique tracked link for that recipient.
You never fill these values in yourself - you only place the token, and the system substitutes it for every target in the campaign.
Variable reference
| Variable | What it is filled with | Where you use it |
|---|---|---|
{{.URL}} | The unique phishing link / capture URL for the recipient | Required in the email (as the link) and in the landing-page form action |
{{.Tracker}} | An invisible open-tracking pixel | Required in both the email and the landing page |
{{.RId}} | The recipient's unique result ID | Required in the landing page (hidden field) |
{{.FirstName}} | The recipient's first name | Optional personalisation |
{{.LastName}} | The recipient's last name | Optional personalisation |
{{.Position}} | The recipient's job position | Optional personalisation |
{{.Email}} | The recipient's email address | Optional personalisation / pre-filled form field |
{{.From}} | The sender address of the email | Optional |
{{.TrackingURL}} | The raw tracking URL (without the pixel markup) | Advanced use |
{{.BaseURL}} | The base URL of the phishing server (no path) | Advanced use, e.g. loading assets |
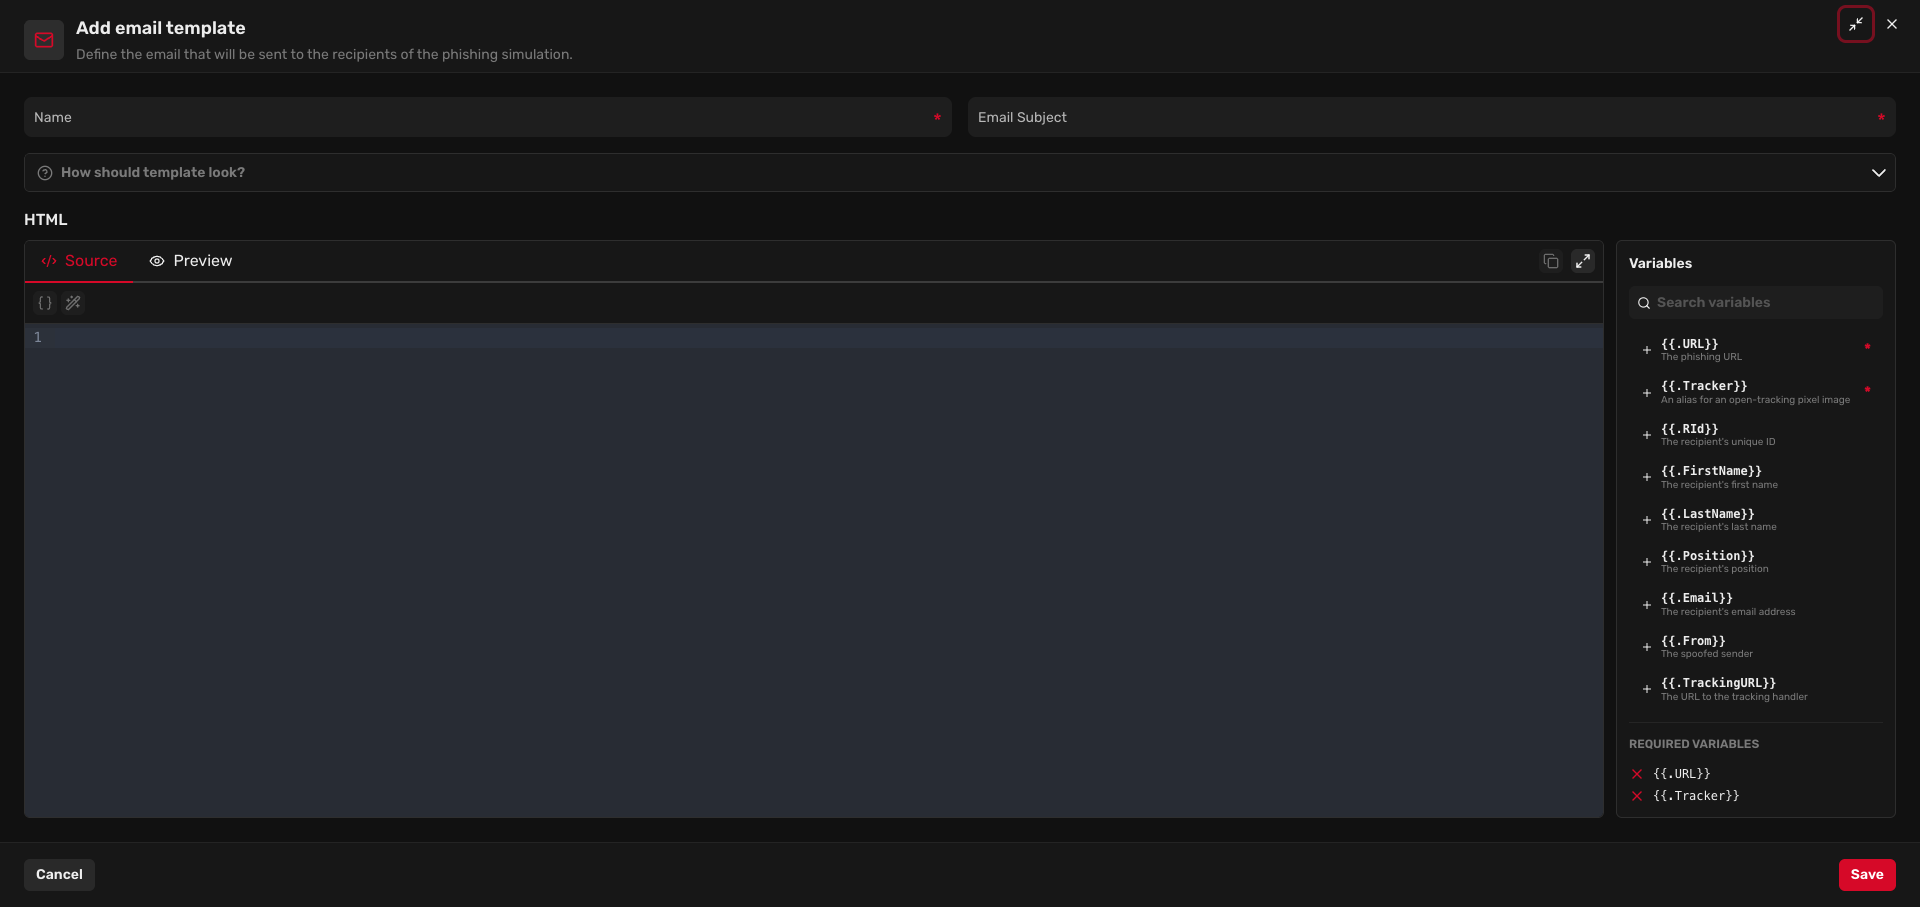
The editor shows this list in the Variables panel next to the HTML. Click the plus next to any variable to insert it at the cursor, and use the Required variables checklist to confirm you have not missed a mandatory one - the Save button stays disabled until every required variable is present.
Working in a larger window
You can give yourself more room while authoring:
- Expand the dialog - click the expand icon in the top-right corner of any creation dialog (next to the close button) to grow it to full screen. Click it again to return to the normal size.
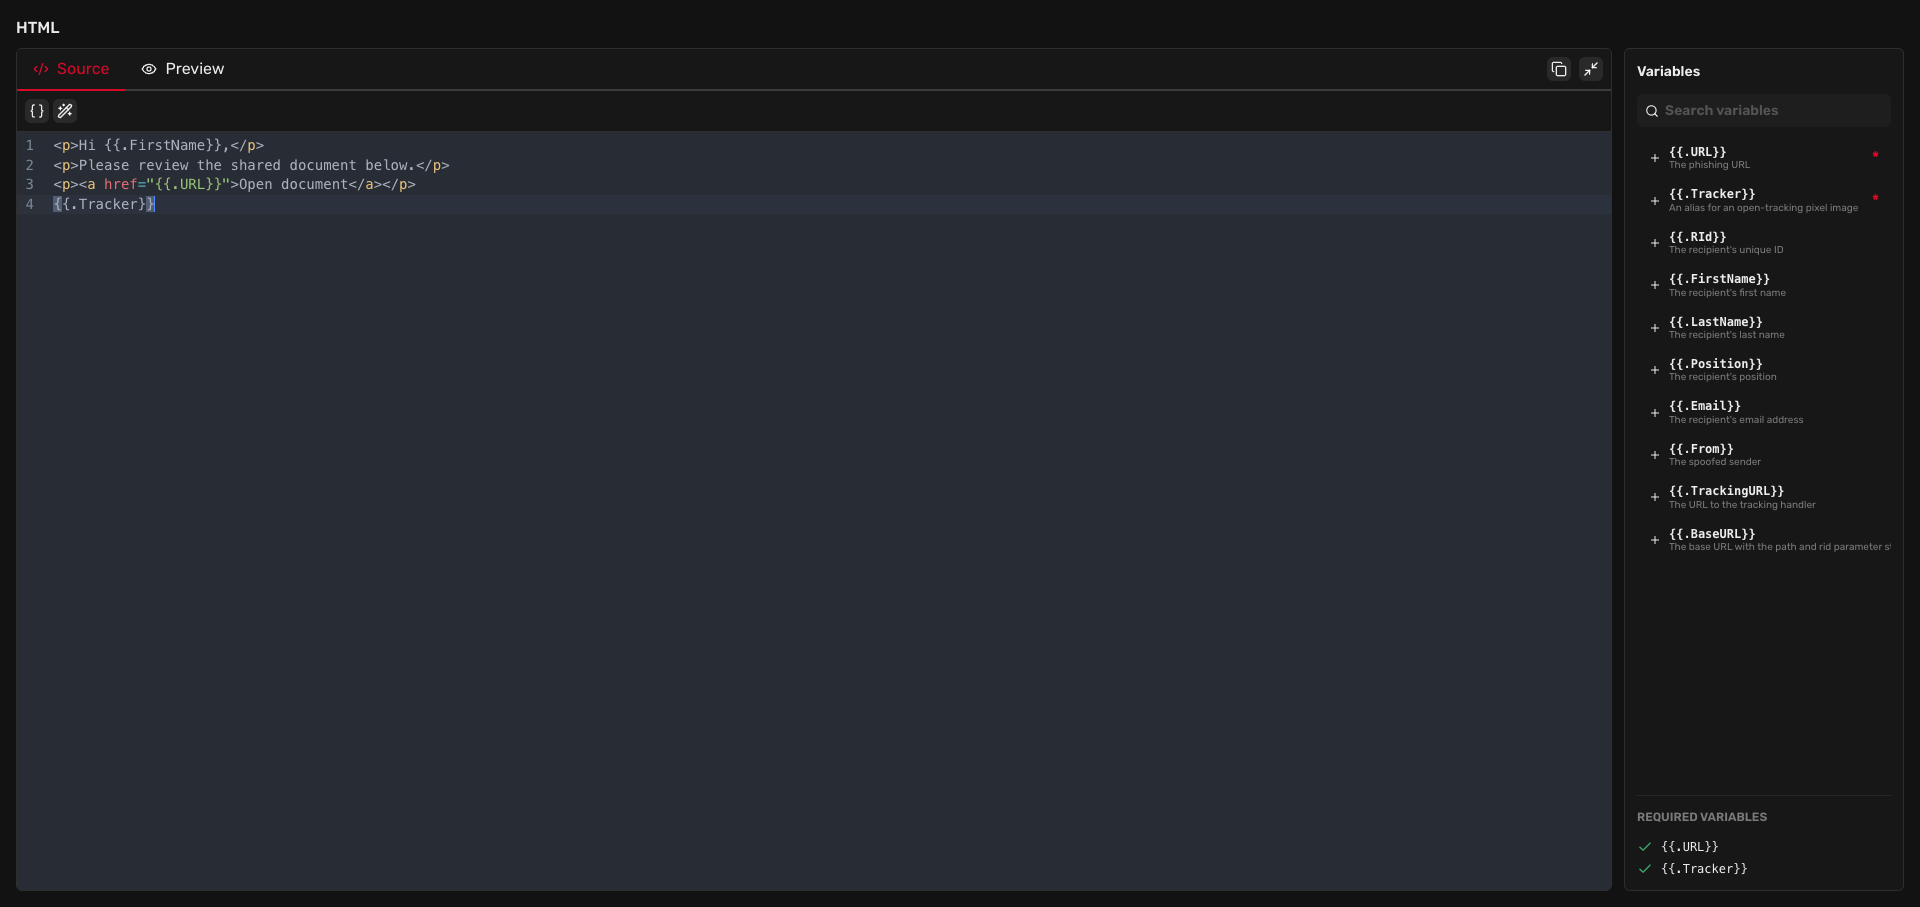
- Expand the HTML editor - the editor has its own full-screen button in its toolbar. It fills the whole window so you get the most space to write and preview HTML, with the variables list still on the right. Press Esc or click the button again to exit.
Step 1 - Create the email template
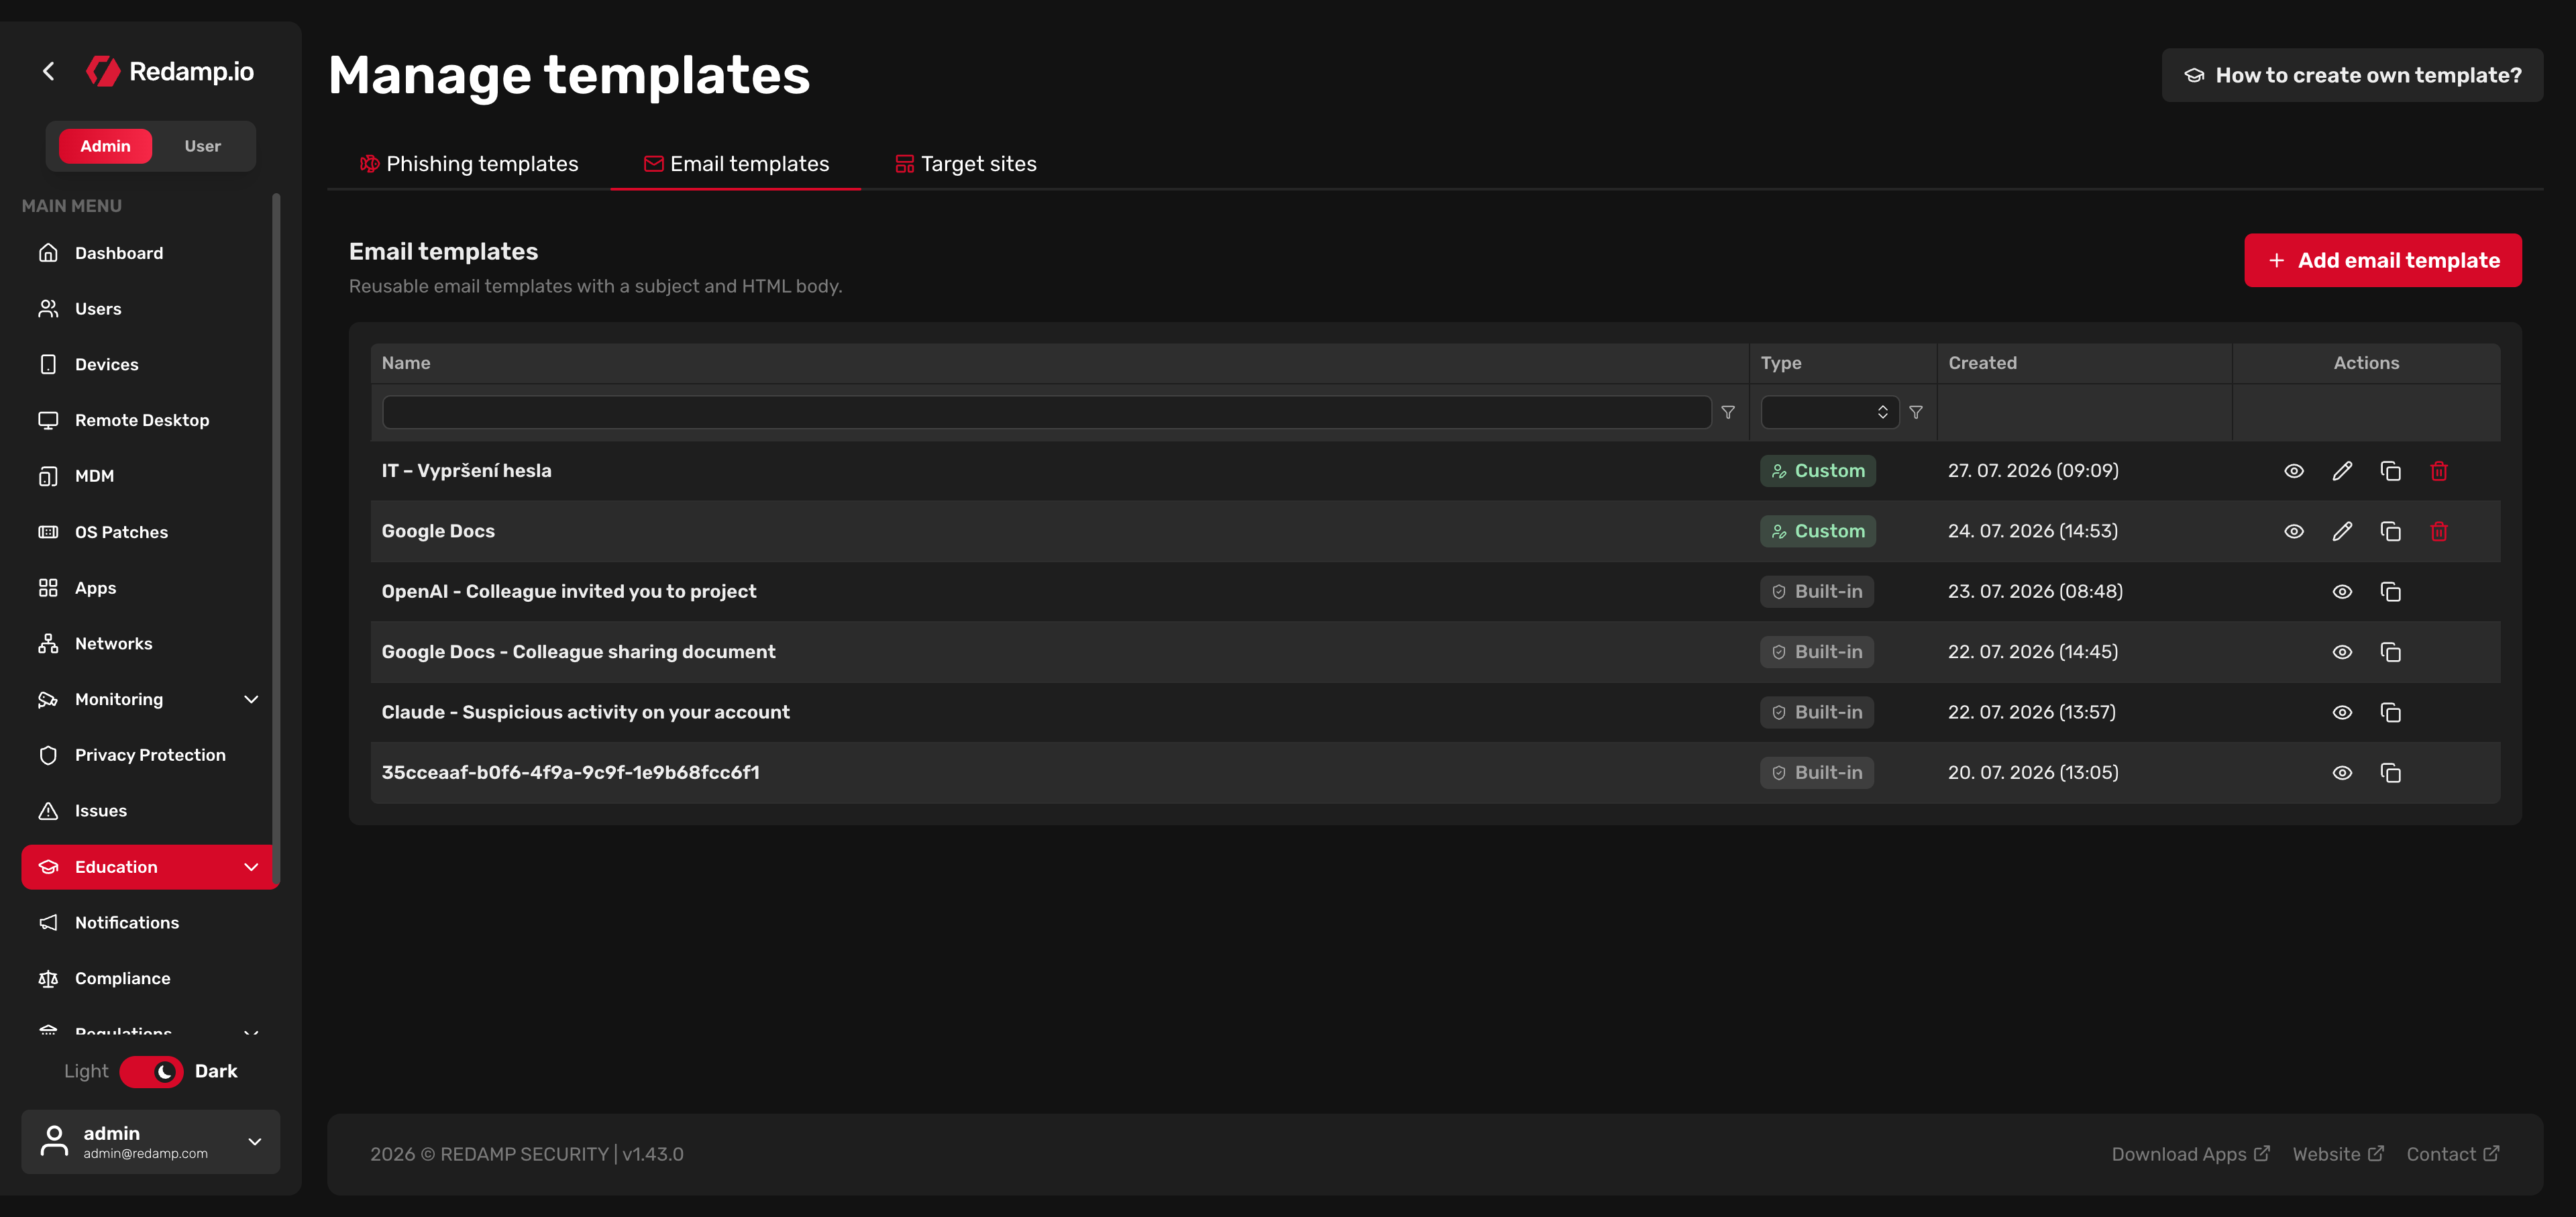
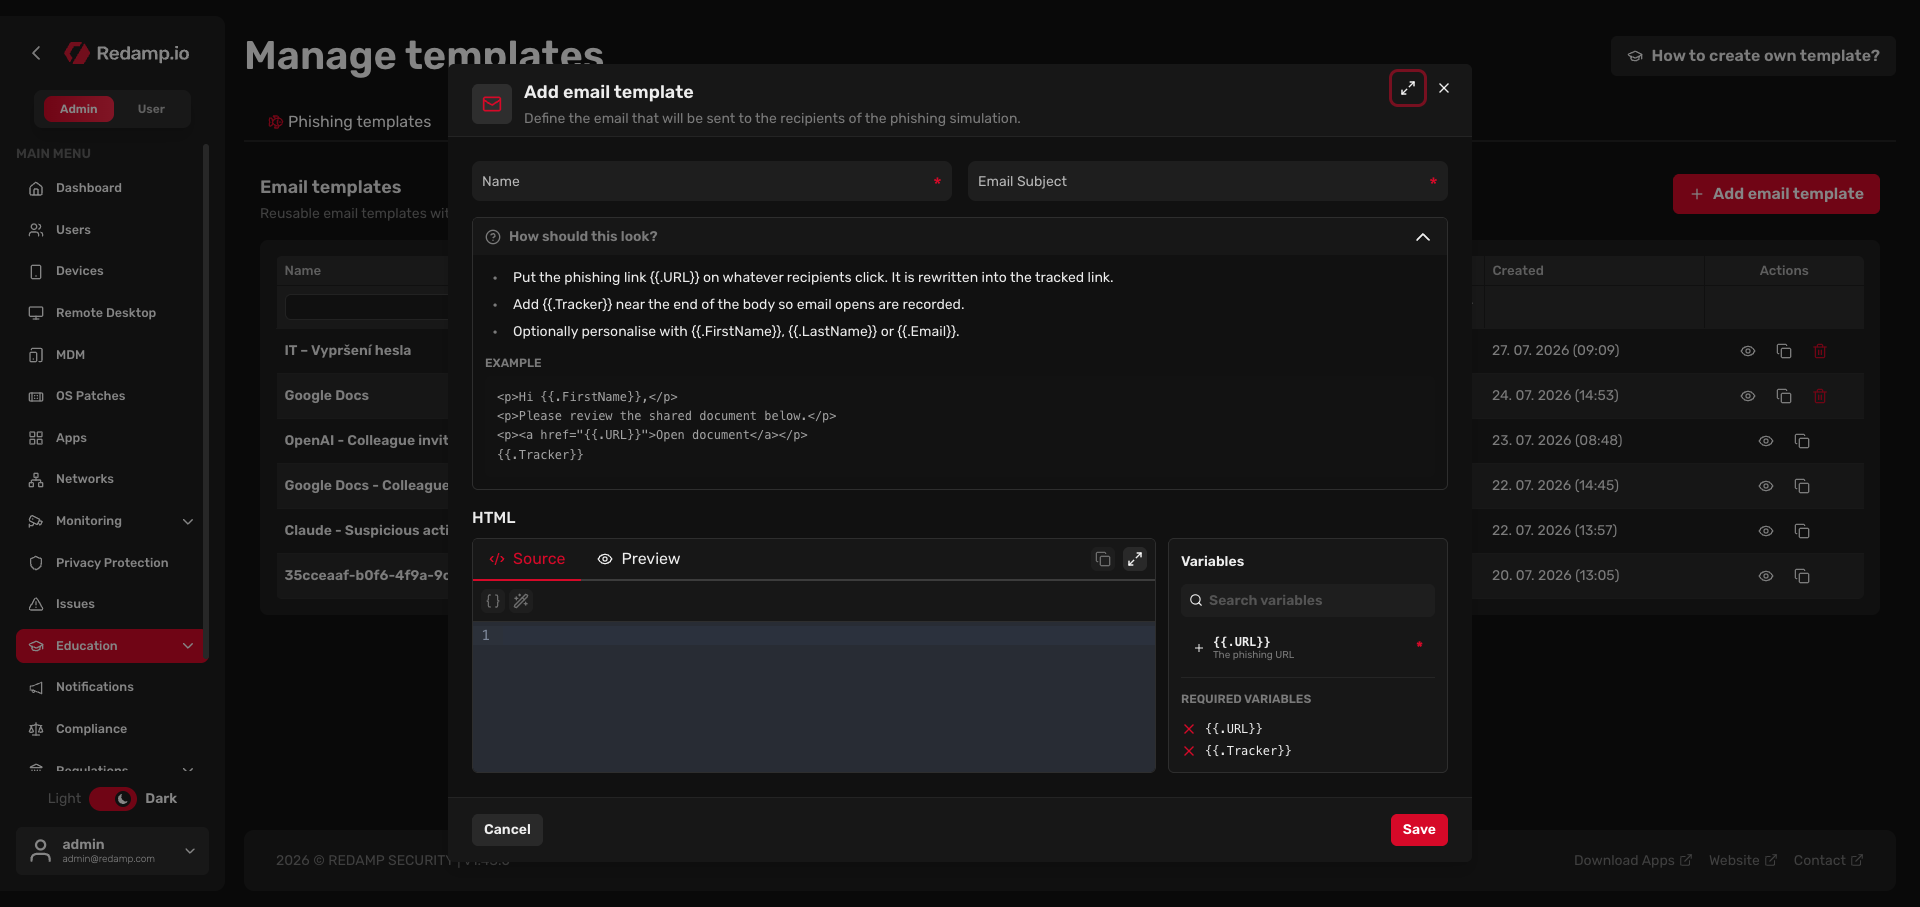
Open the Email templates tab and click Add email template.
Fill in:
- Name - an internal label so you can find the template later (recipients never see it).
- Email subject - the subject line of the message. You may personalise it with variables, e.g.
Action required, {{.FirstName}}. - HTML body - the content of the email. Use the Source view to paste or write raw HTML, or Preview to see how it renders.
Requirements for the email body
- The body must contain the phishing link
{{.URL}}. Put it on whatever the recipient is meant to click (a button or a text link). Redamp.io rewrites it into the per-recipient tracked link. - The body must contain the open-tracking pixel
{{.Tracker}}. Place it near the end of the body so message opens are recorded. - Optionally personalise the message with
{{.FirstName}},{{.LastName}},{{.Position}}or{{.Email}}.
The collapsible How should this look? panel at the top of the form repeats these rules and shows a ready example.
Example email body
<p>Hi {{.FirstName}},</p>
<p>Please review the shared document below.</p>
<p><a href="{{.URL}}">Open document</a></p>
{{.Tracker}}
Click Save. The new template appears in the list with the Custom type.
Step 2 - Create the target site (landing page)
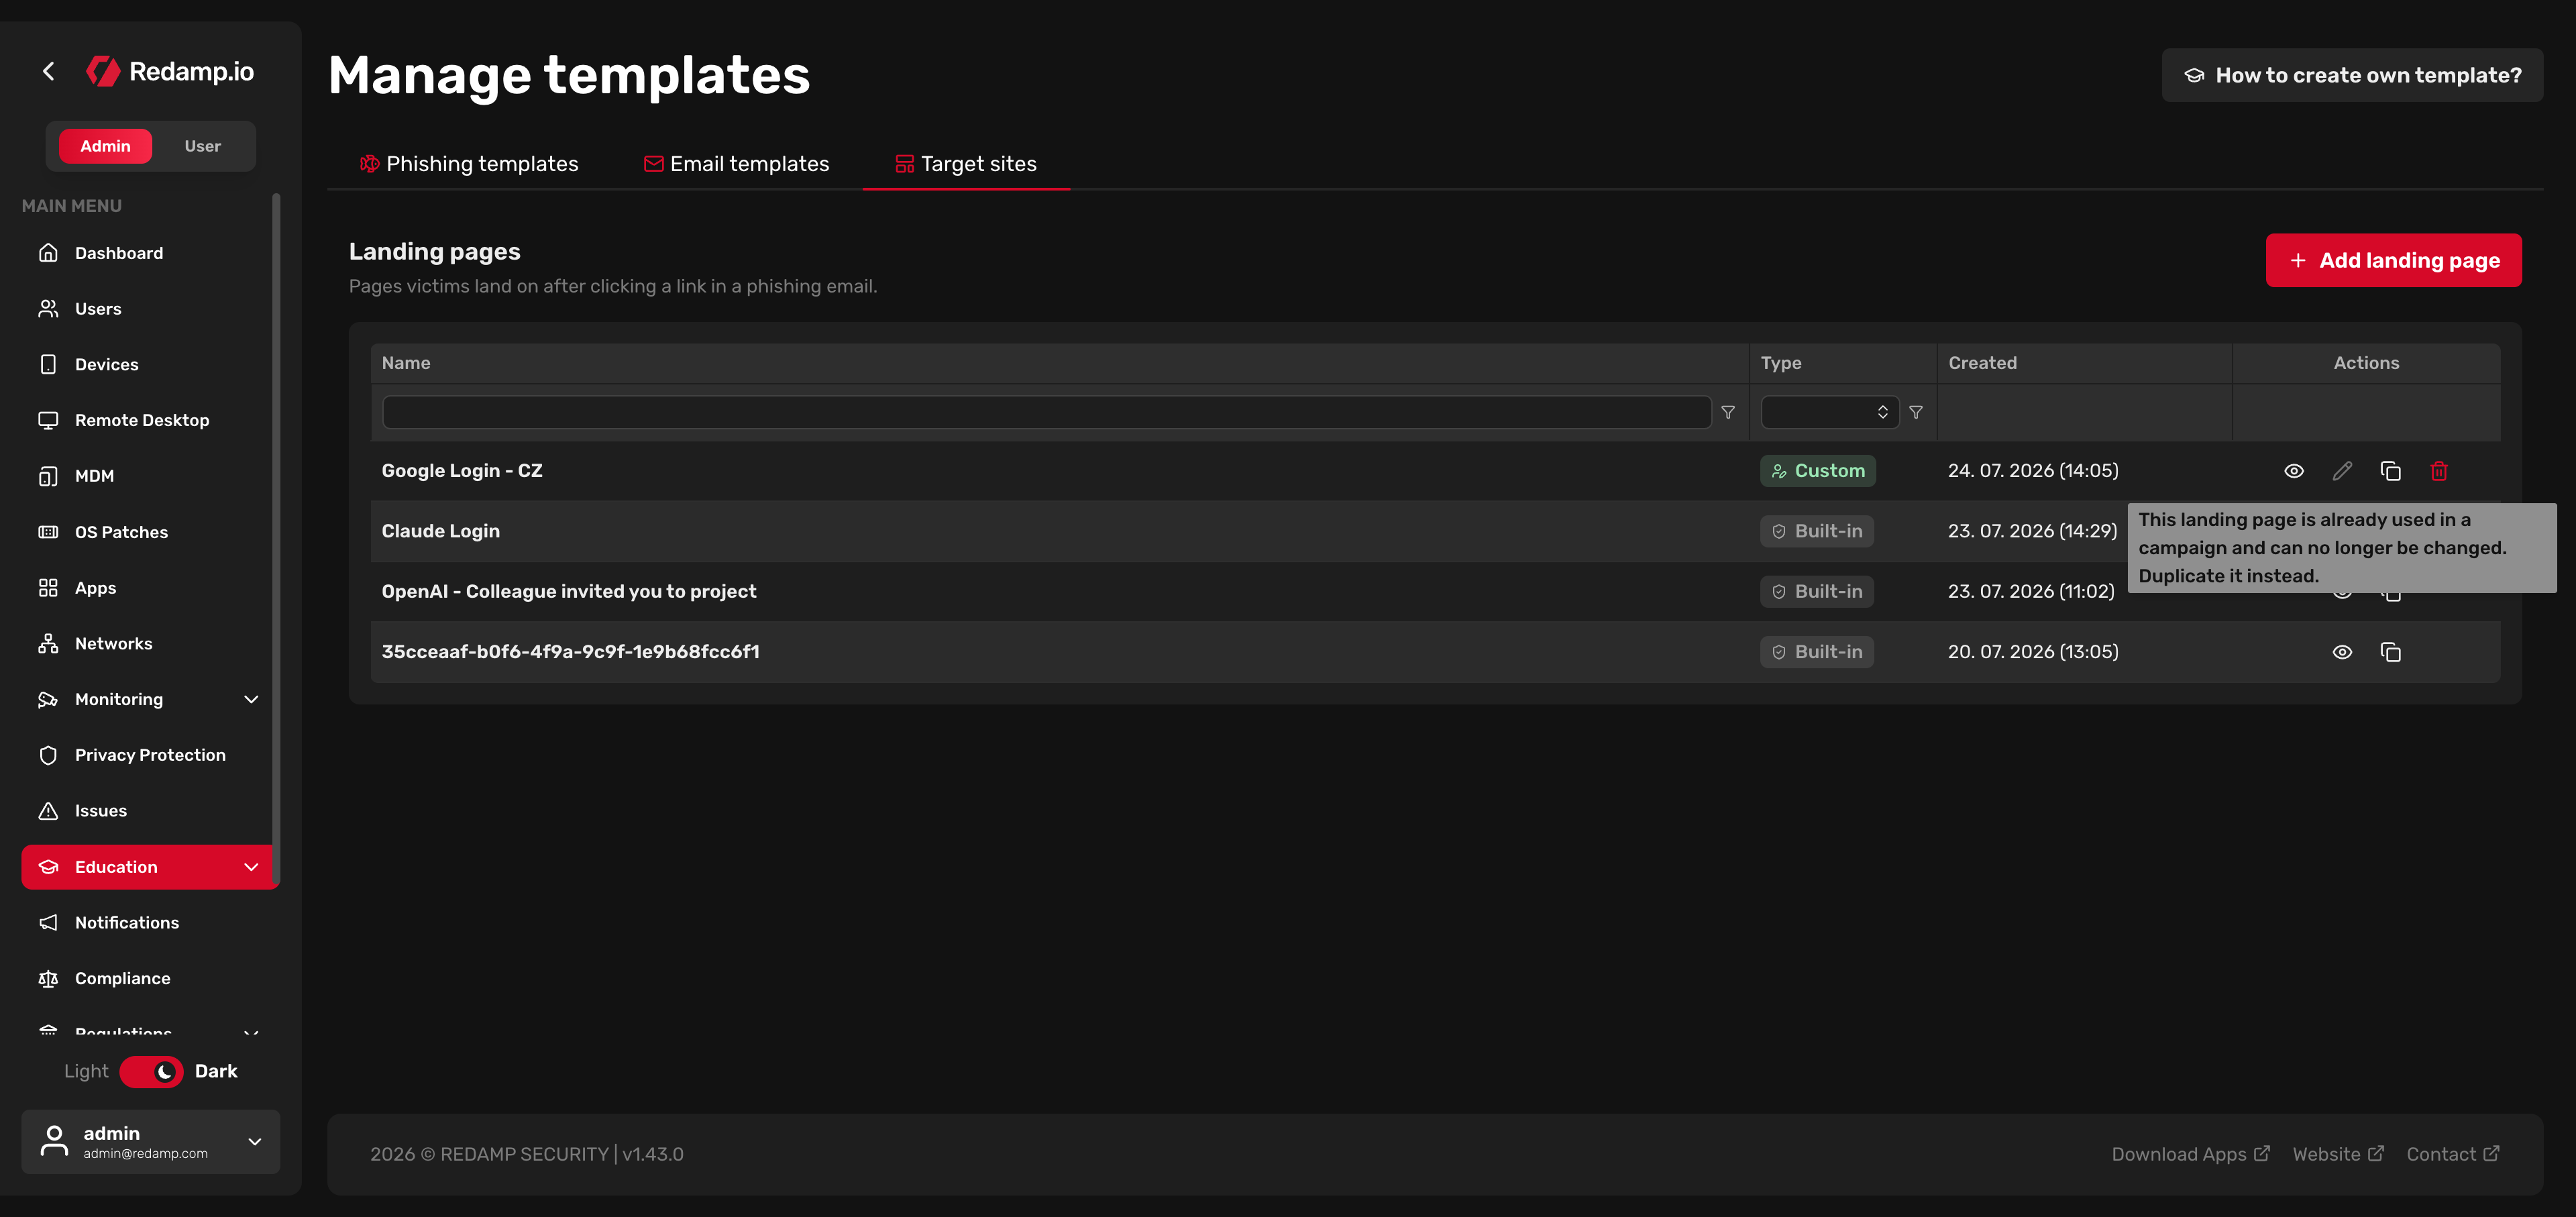
Open the Target sites tab and click Add landing page.
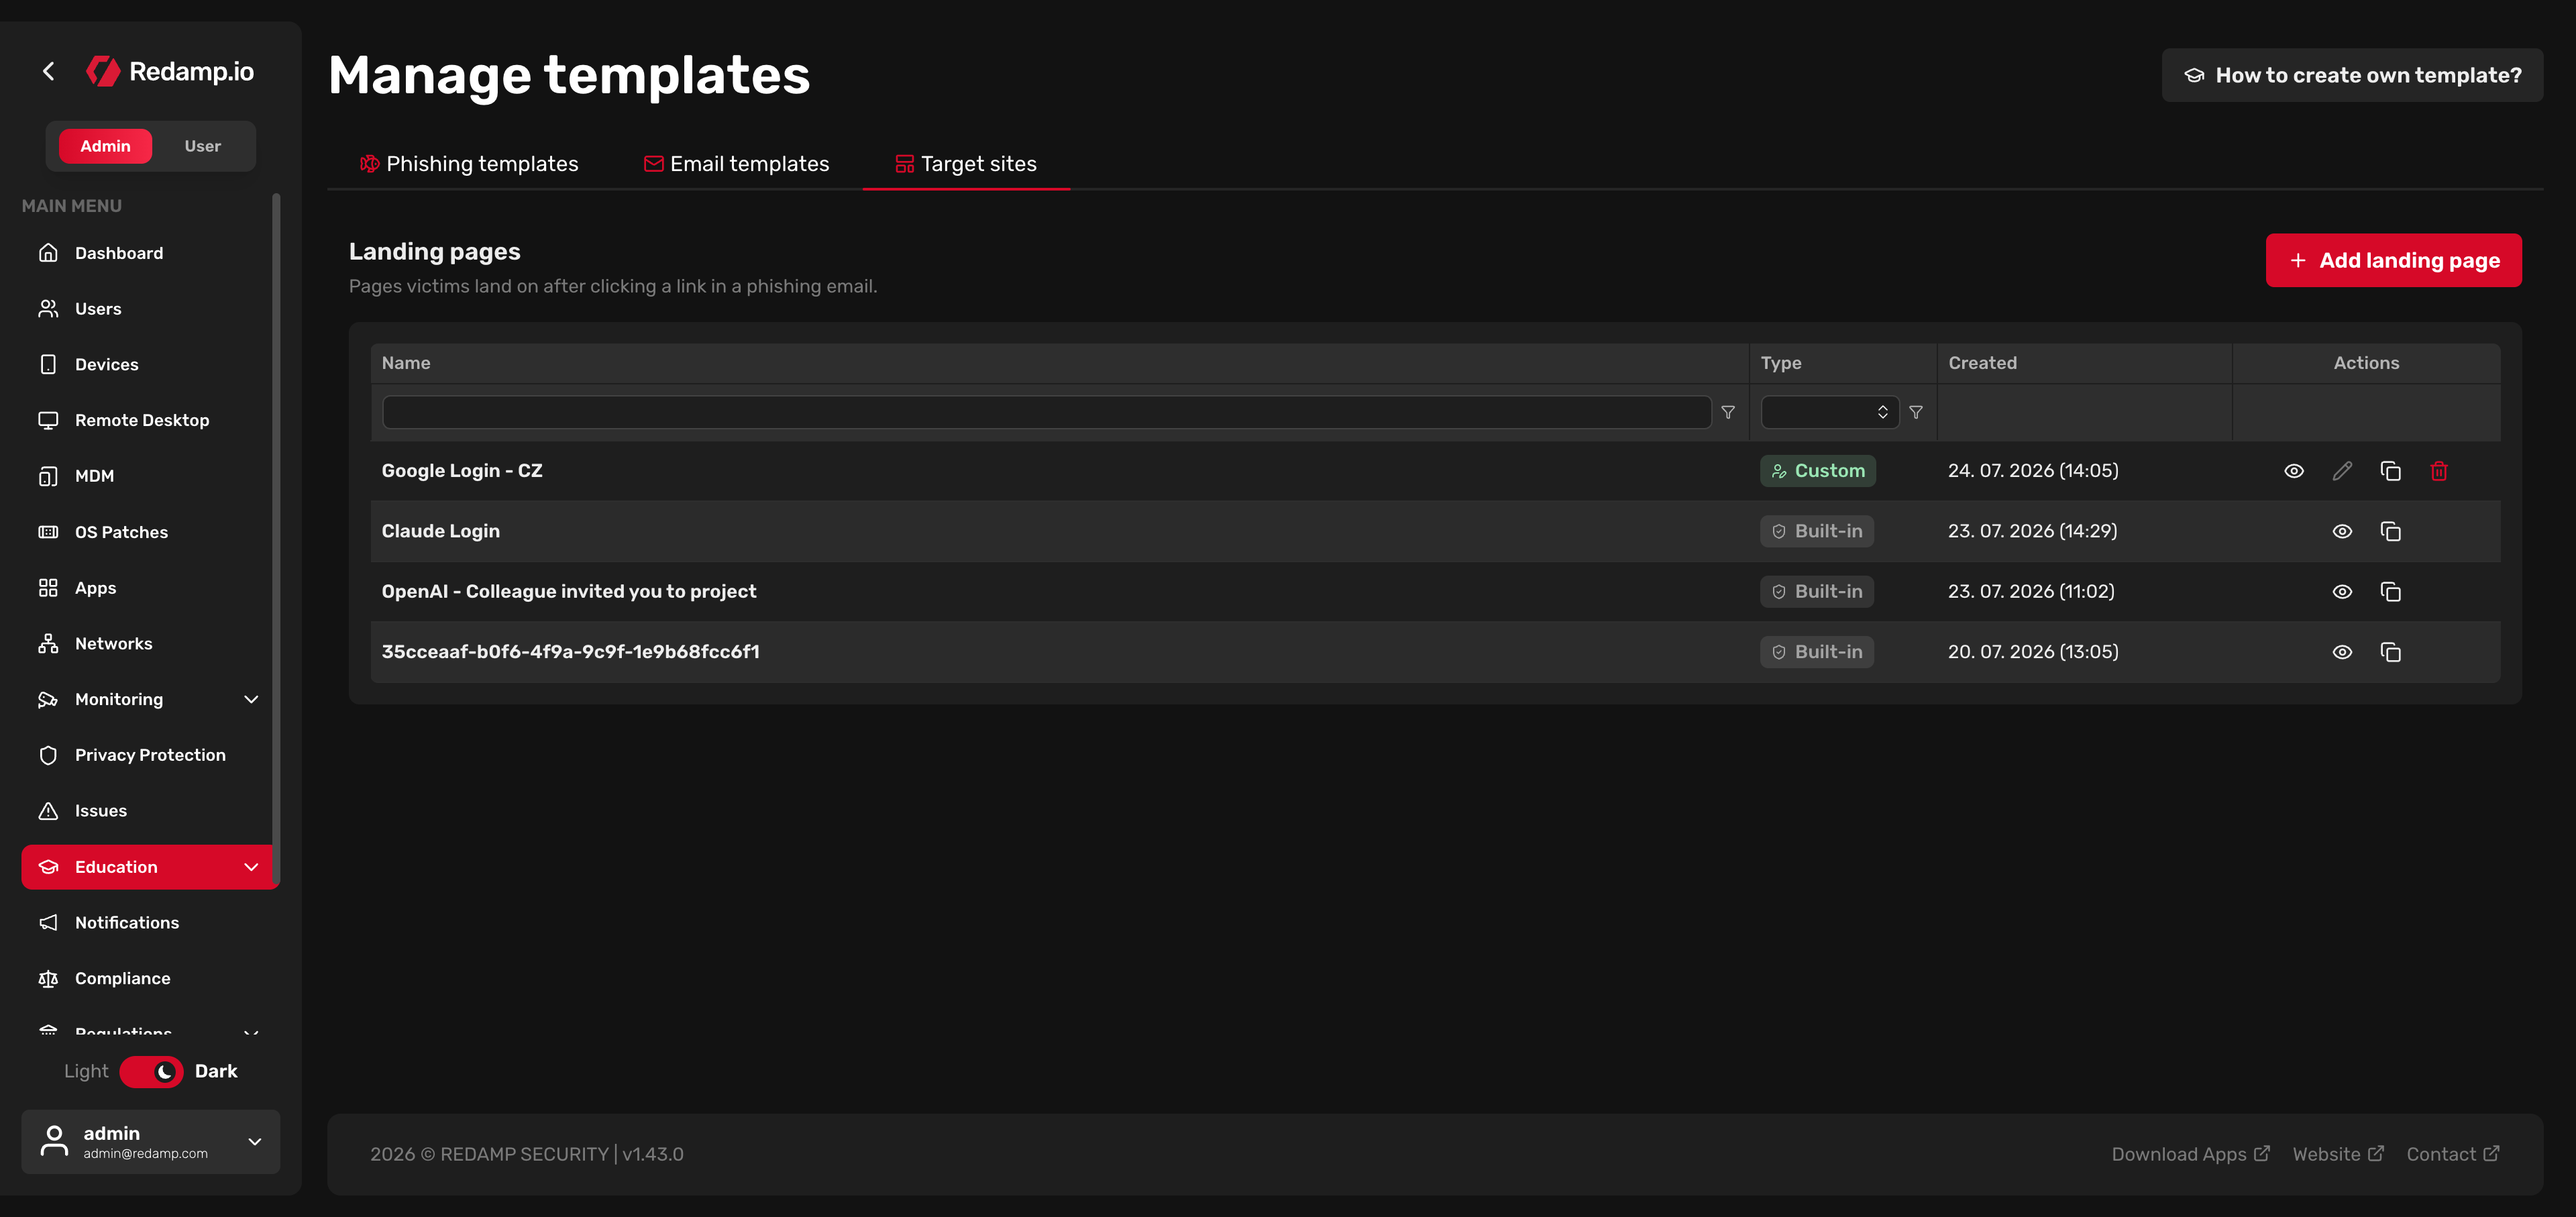
Fill in:
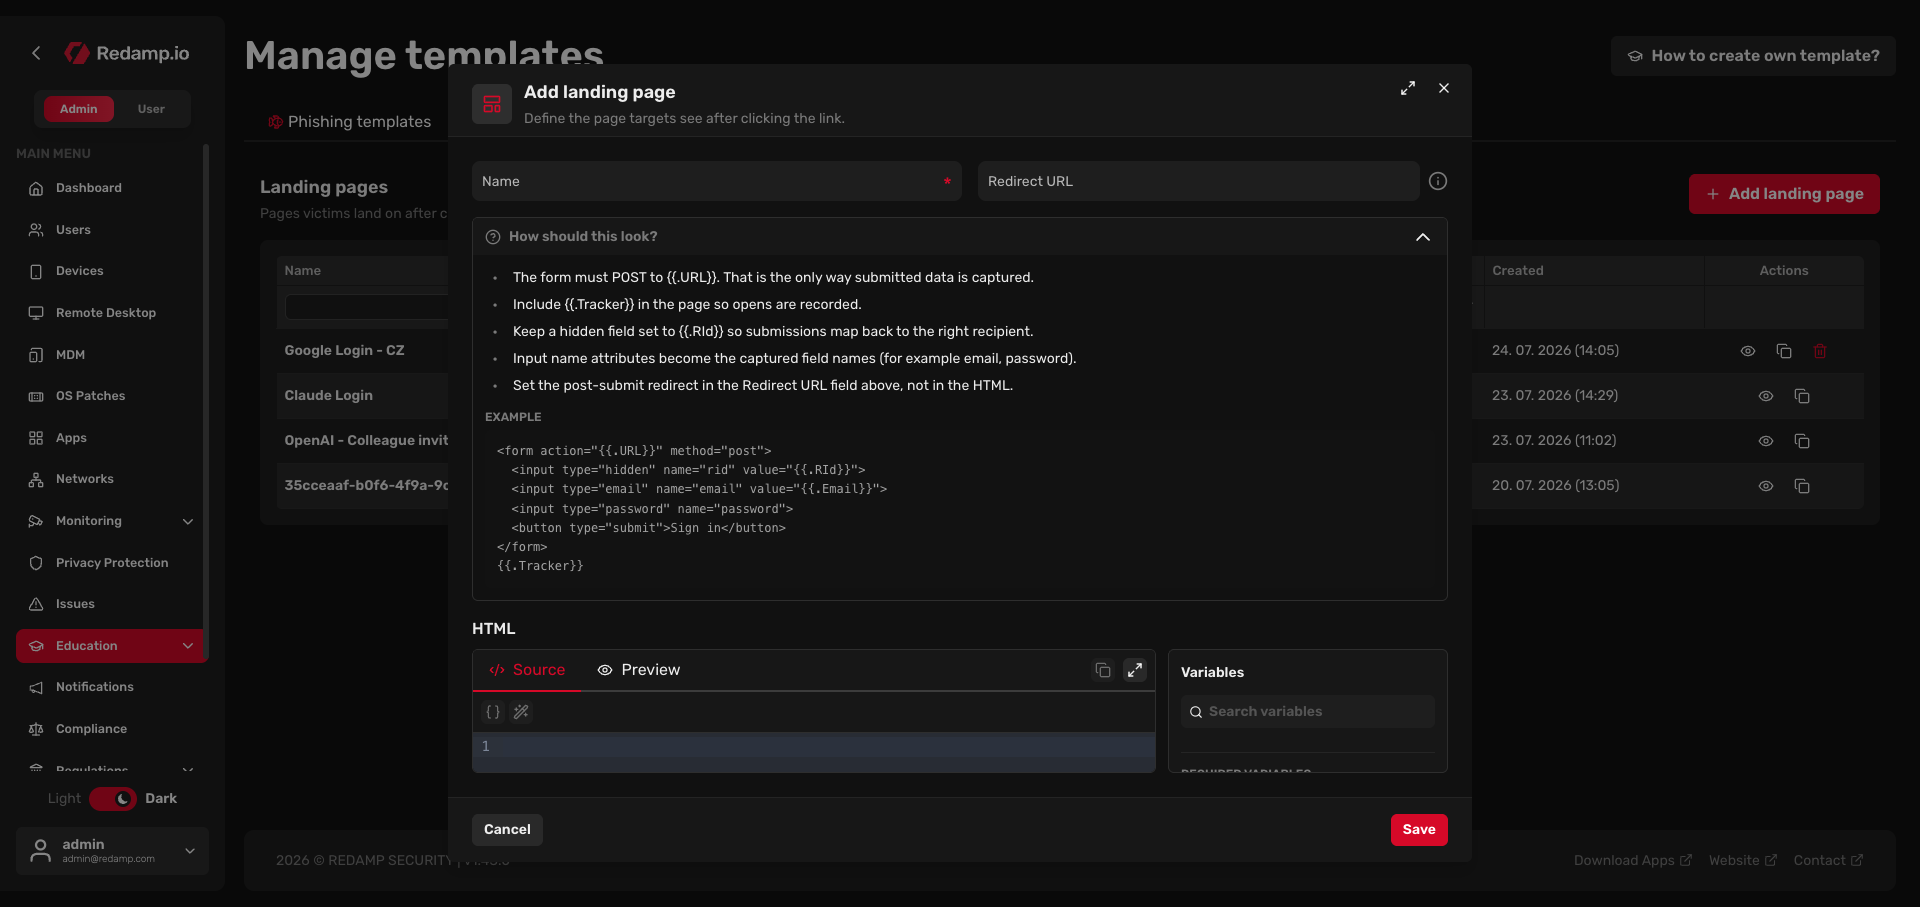
- Name - an internal label for the page.
- Redirect URL (optional) - where the recipient is sent after they submit the form (for example your awareness page). Set the redirect here, not inside the HTML.
- HTML body - the page the recipient lands on. This is typically a copy of a familiar login screen.
Requirements for the landing page
- The capture form must POST to
{{.URL}}. This is the only way submitted data is recorded - a form that posts anywhere else captures nothing. - Keep a hidden field set to
{{.RId}}so each submission maps back to the correct recipient. - Include
{{.Tracker}}in the page so page opens are recorded. - The
nameattribute of each input becomes the captured field name in the results (for exampleemail,password). Never store real passwords - this is a simulation, and captured values are only used to prove the recipient submitted something.
The How should this look? panel and the live checklist next to the editor validate the two structural rules (form posts to {{.URL}}, hidden field carries {{.RId}}) as you type.
Example landing page
<form action="{{.URL}}" method="post">
  <input type="hidden" name="rid" value="{{.RId}}">
  <input type="email" name="email" value="{{.Email}}">
  <input type="password" name="password">
  <button type="submit">Sign in</button>
</form>
{{.Tracker}}
Click Save. The page appears in the list with the Custom type.
Step 3 - Connect them in a phishing template
Open the Phishing templates tab and click Add template.
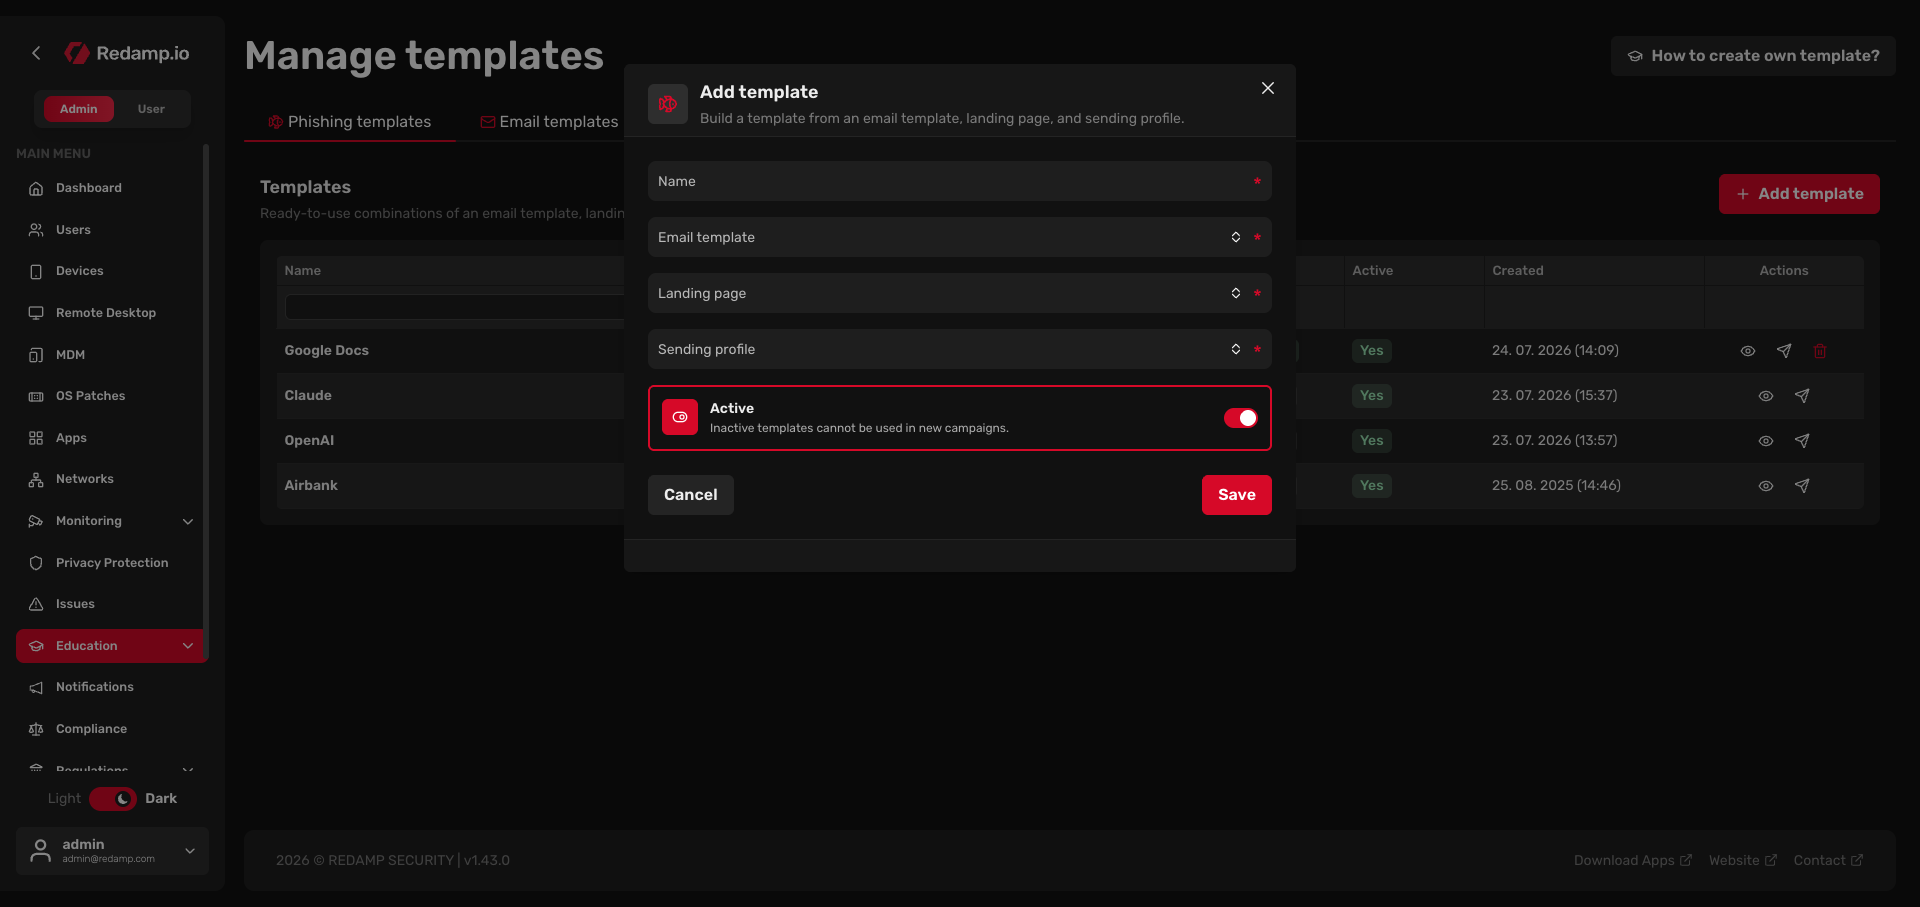
Fill in:
- Name - the label you will pick when creating a campaign.
- Email template - the email template you created in Step 1.
- Landing page - the target site you created in Step 2.
- Sending profile - the mail server / sender identity the email is sent from. Sending profiles are managed by your Redamp.io administrator; pick the one that fits the scenario.
- Active - keep this on so the template can be used in new campaigns. Inactive templates are hidden from the campaign wizard.
Click Save. Your phishing template is now ready and will be offered in the Create campaign flow.
Testing your template
From the Phishing templates list, use the Send test action to deliver the email to yourself (or a chosen address) before running a real campaign. This is the fastest way to confirm the links, variables, and landing page all behave as expected.
You can also view any email template, landing page, or phishing template, and duplicate a built-in one as a starting point for your own custom version.
Editing an existing template
You can change an email template or a landing page you created earlier - as long as it has not been used in a campaign yet:
- Open the Email templates or Target sites tab and click the Edit (pencil) action on the row. The item opens in the same authoring form, where you can change any field and click Save to update it in place.
- Only your own Custom items can be edited. Built-in items can only be viewed or duplicated.
Once an item has been used in a campaign it is frozen and can no longer be edited - the Edit action is greyed out. This keeps already-sent simulations and their recorded results consistent. To make a changed version, use Duplicate to create an editable copy, adjust it, and use the copy from then on.
Note: Phishing templates themselves are not edited directly. Change the email template or landing page they combine (or duplicate them), then build a new phishing template if you need a different combination.
Common mistakes
- Missing
{{.URL}}or{{.Tracker}}- the editor will not let you save an email template without both. Add them and the Save button re-enables. - The landing-page form posts to a real site - submissions are only captured when the form action is
{{.URL}}. - Forgetting the hidden
{{.RId}}field - without it, captured submissions cannot be attributed to the right recipient. - Putting the redirect inside the HTML - use the dedicated Redirect URL field instead so tracking is not lost.