Setting up iOS & iPadOS MDM
Learn how to setup iOS & iPadOS MDM in Redamp.io platform.
Managing iPhones and iPads across your company shouldn't require an enterprise IT department. This guide walks you through getting Mobile Device Management (MDM) running for your Apple devices, from your very first login to enrolling that first iPad on a colleague's desk.
The setup happens in three stages: confirming your MDM is provisioned, generating an Apple Push Notification certificate, and enrolling your first device. Depending on what you see when you open the MDM section, you may be able to skip straight to the device enrollment step.
Stage 1: Open the MDM Section and Check What You See
Log in to your admin console and navigate to the MDM section in the sidebar.
What happens next depends on the screen you land on. There are two possibilities, and each one has a different next step.
Scenario A: You See a "MDM is not available" Screen
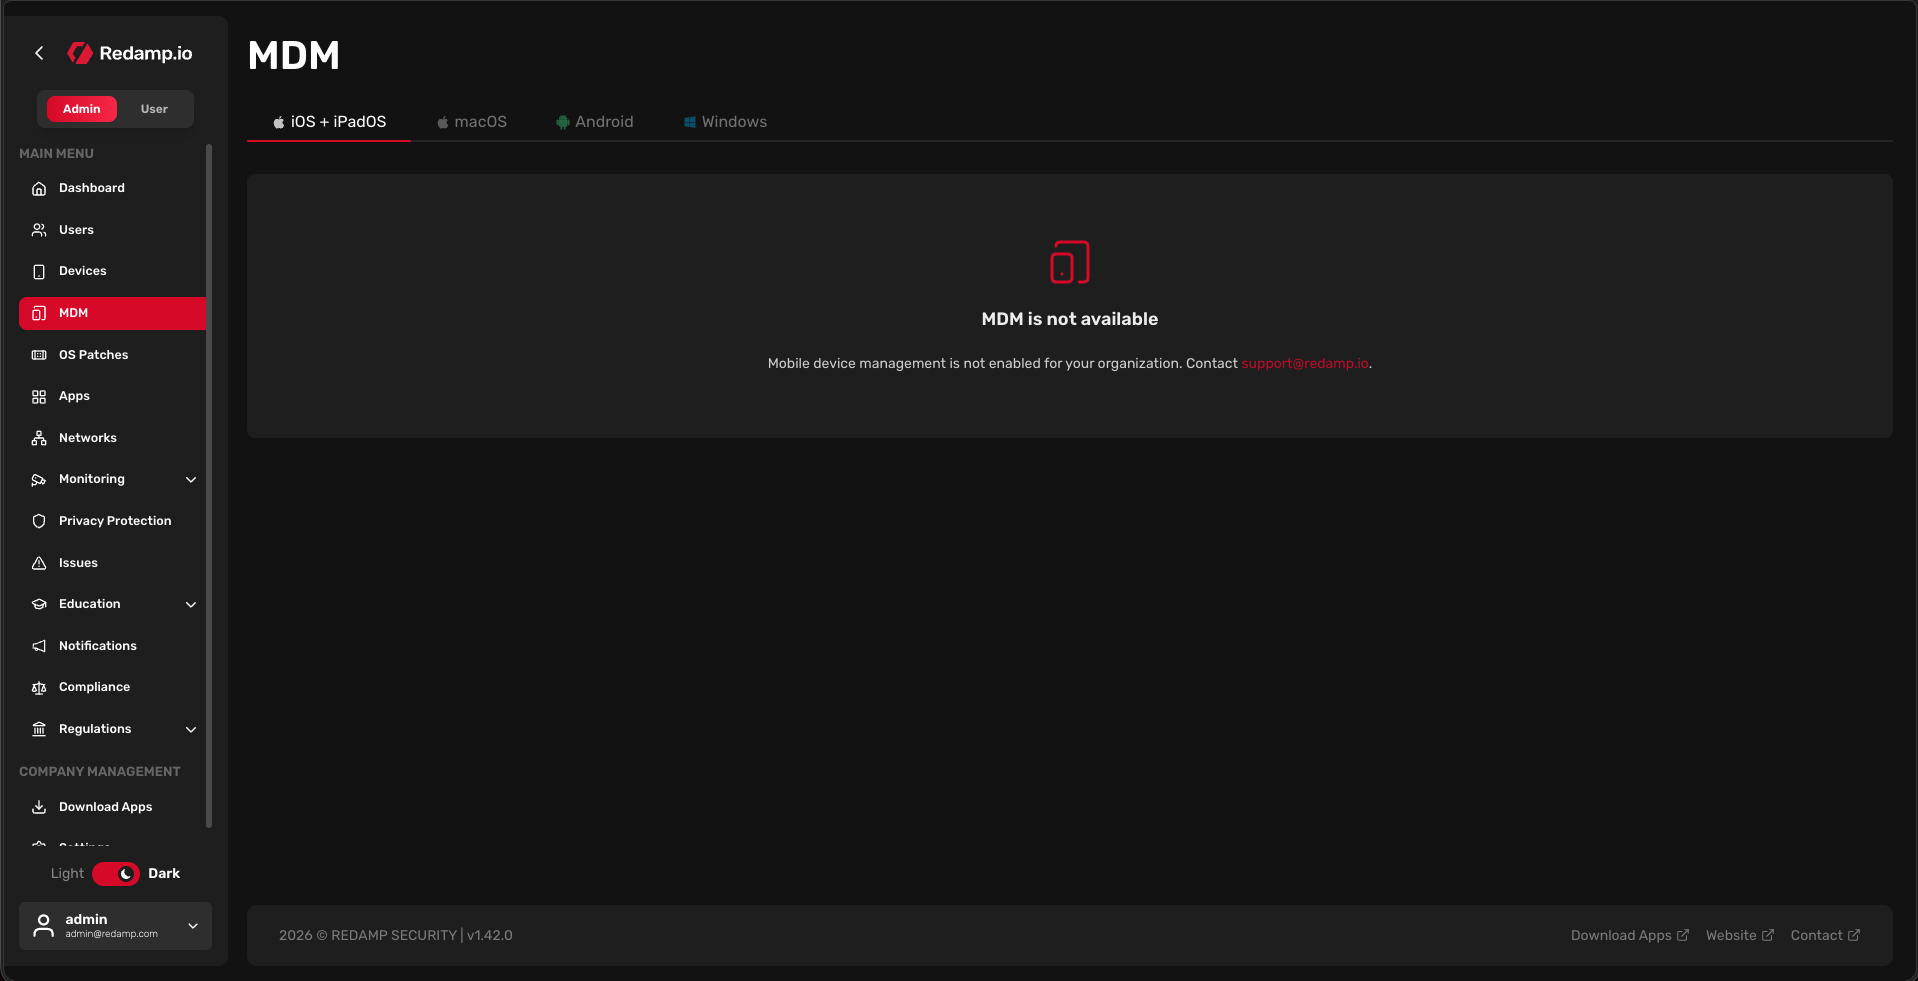
If the MDM section greets you with a contact screen (rather than a configuration form), it means your account hasn't been provisioned for MDM yet.
What to do: Reach out to us through the contact form or email us directly at [email protected] . We handle the backend provisioning on our side, set everything up for you, and let you know once it's ready.
Once we've finished provisioning, the next time you open the MDM section you'll see the Setup screen described below.
Scenario B: You See the "No MDM setup yet" Screen
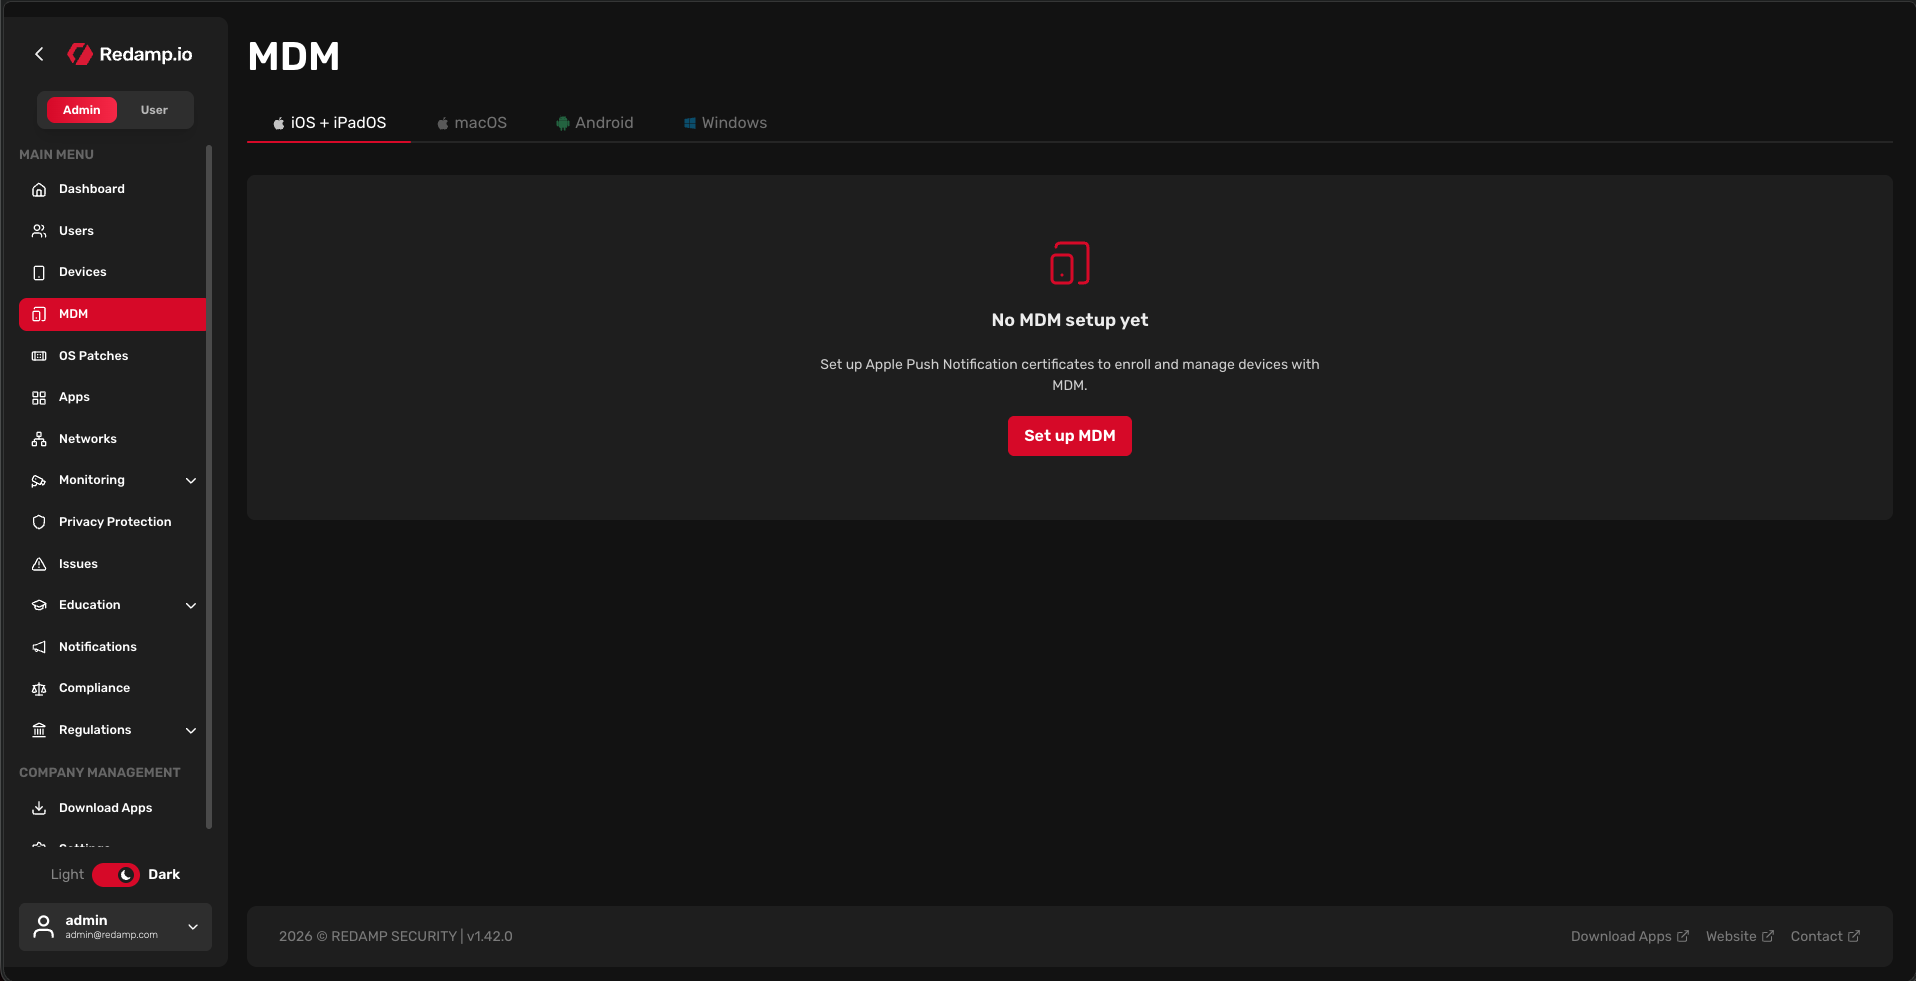
If you see a setup screen with options to download a CSR (Certificate Signing Request), your account is provisioned and ready. You just need to connect it to Apple's push notification service before you can manage devices. Continue to Stage 2.
Stage 2: Generate an Apple Push Notification Certificate
Apple requires every MDM solution to authenticate with their push service using a certificate that you, as the account owner, generate through your own Apple ID. This is a one-time setup per Apple ID, and the certificate is valid for one year (with easy renewal).
We highly recommend using a dedicated company-owned Apple ID for this purpose. If the employee who created it leaves, you lose access to the MDM.
Prerequisite: Download the CSR Certificate from our console
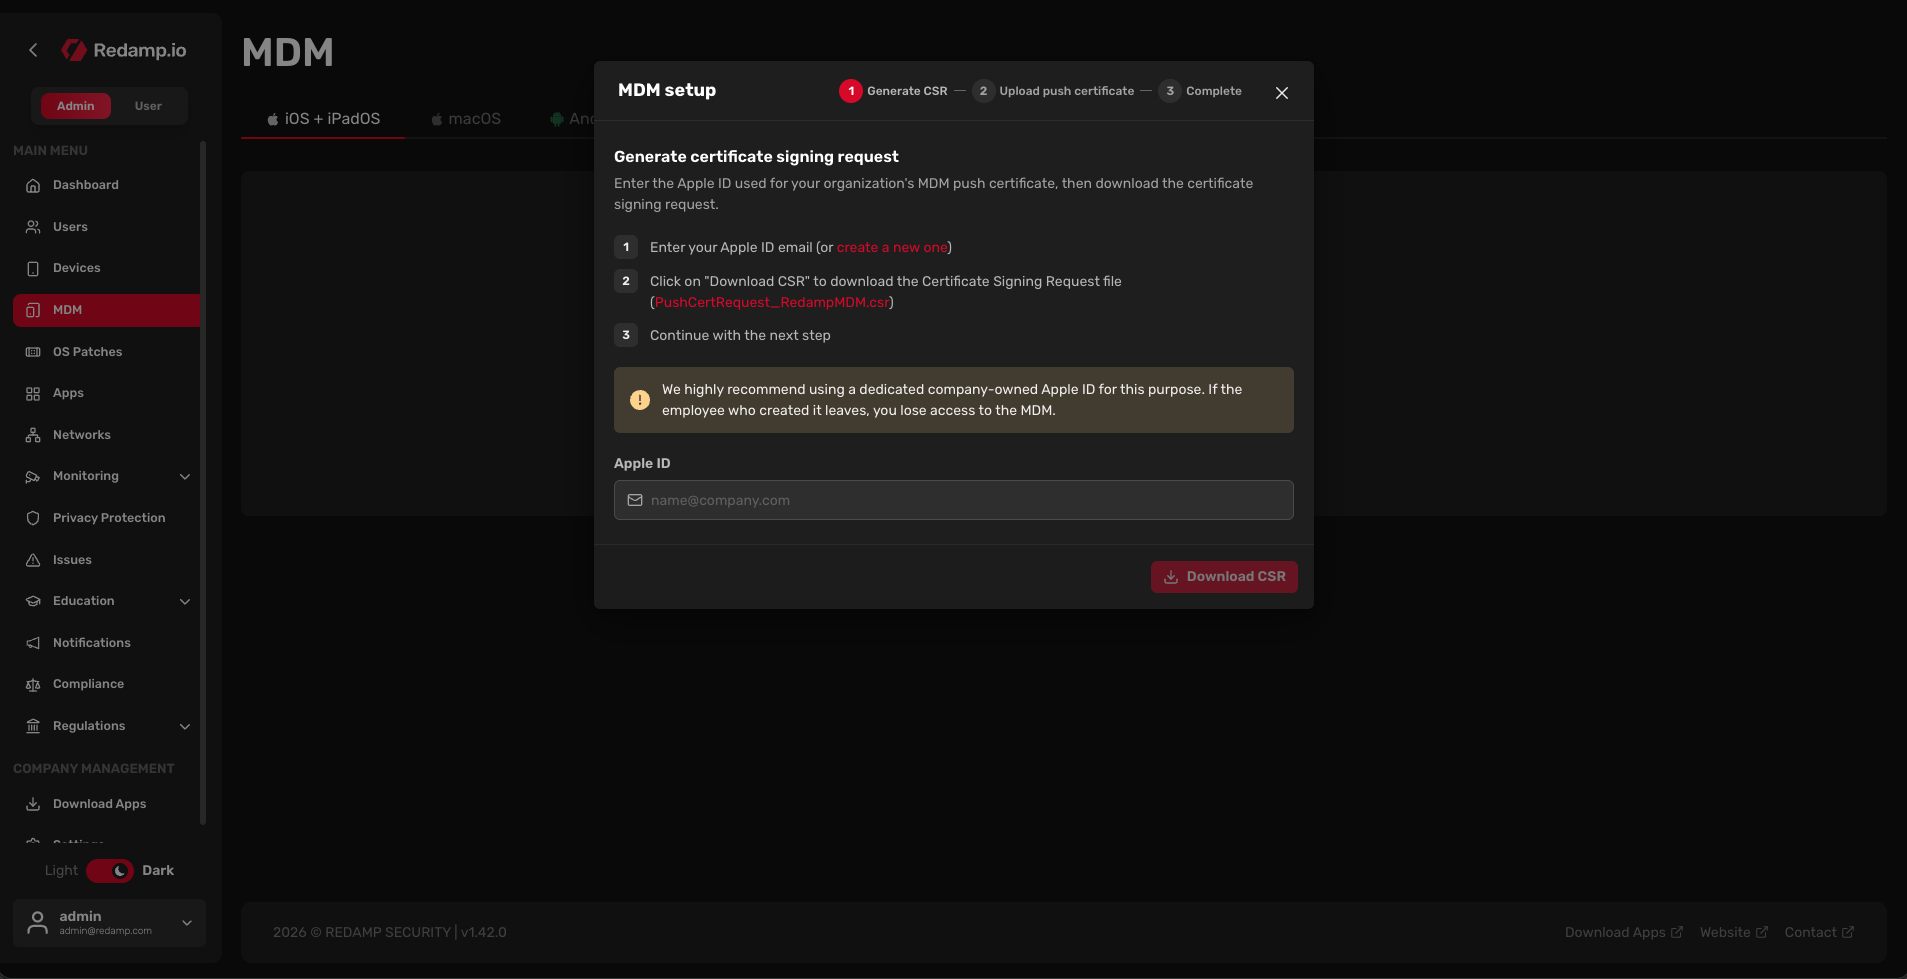
On the MDM Setup screen, click on the Setup MDM button, enter your Apple ID email and then click on the Download CSR button. This downloads a small file (.csr) to your computer. Keep it handy, you'll upload it to Apple in a moment.
Video Guide
Step 1: Open the Apple Push Certificates Portal
In a new browser tab, go to https://identity.apple.com/pushcert .
Sign in with the Apple ID you want to associate with your company's MDM.
Step 2: Create a New Push Certificate
Once you're signed in to the Apple Push Certificates Portal:
- Click Create a Certificate.
- Accept Apple's terms of use.
- Click Choose File and upload the CSR file you downloaded from our console.
- Click Upload.
Apple will process the request (usually instantly) and present you with a new certificate entry. Click Download next to it. You'll get a .pem file, this is your Apple Push Notification certificate (APNs cert).
Step 3: Upload the Certificate Back to Our Console
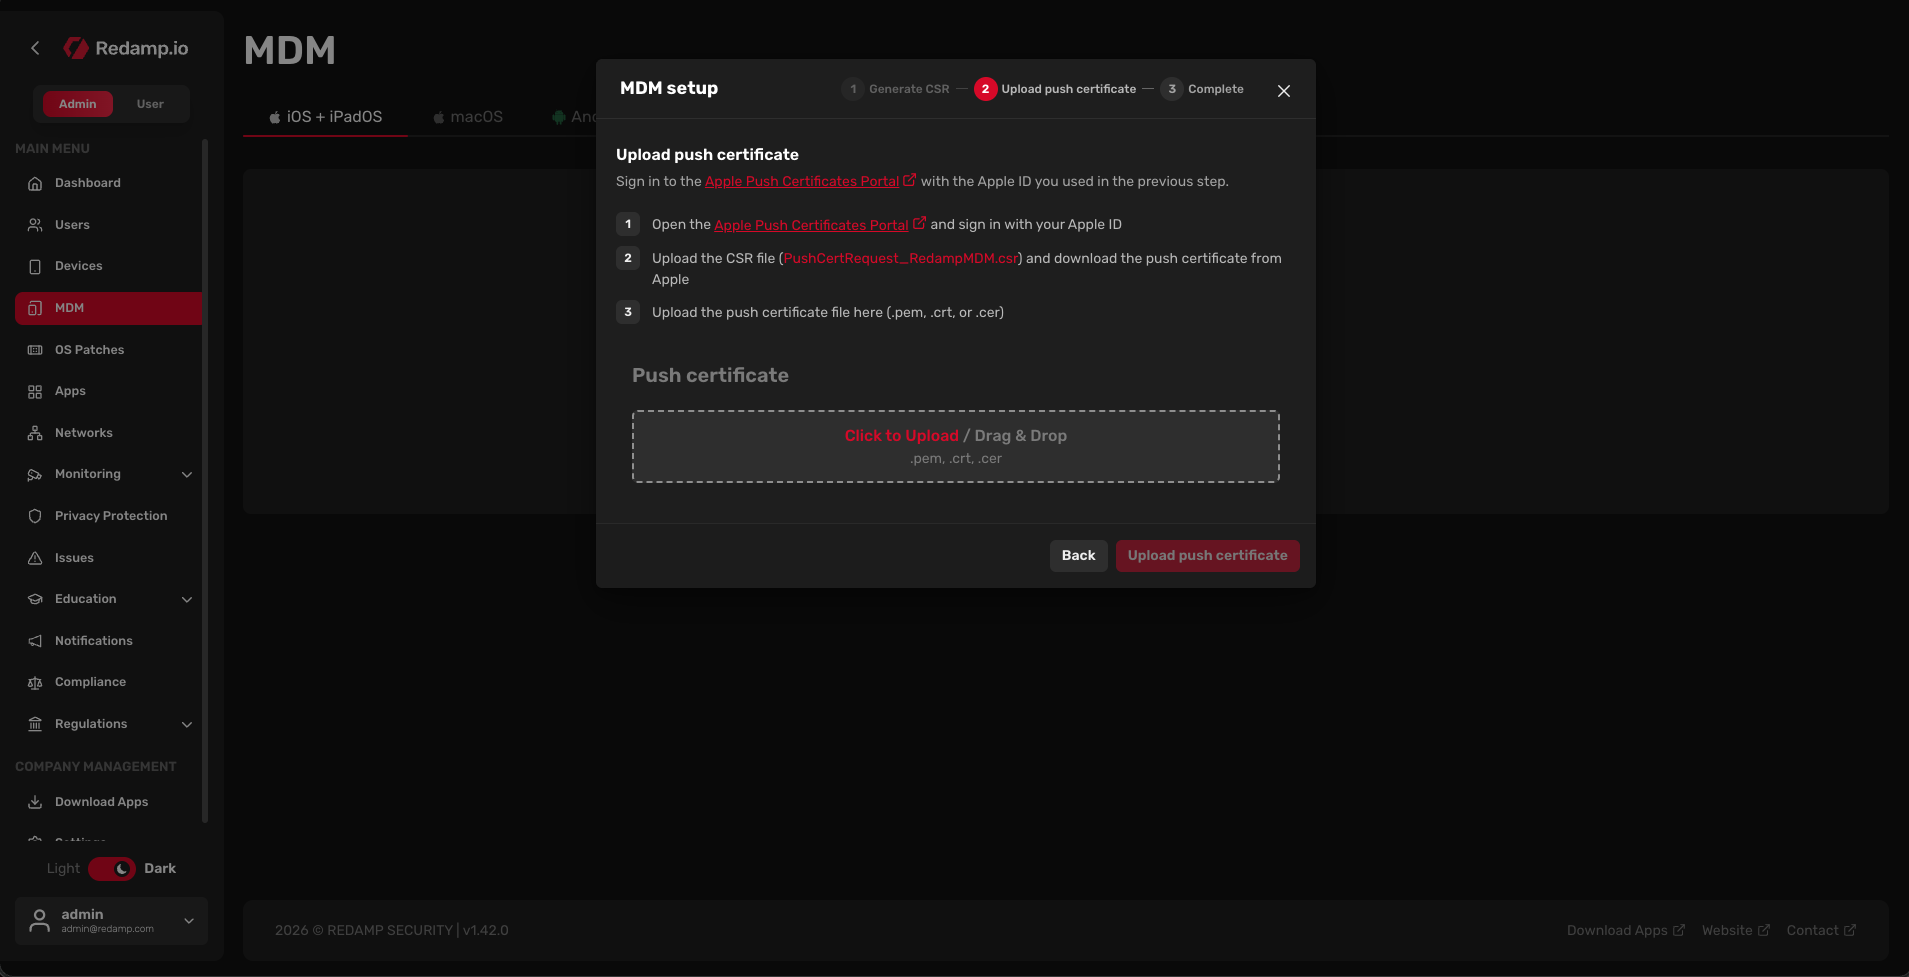
Return to the MDM Setup screen in our console. Drag and drop the .pem file you just downloaded from Apple into the Push Certificate field.
And click on the Upload push certificate button.
Stage 3: Enroll Your First Device
With MDM provisioned and Apple's push service connected, you're ready to bring a device under management.
Prerequisite: Our App Must Already Be Installed
Before you can enroll an iOS or iPadOS device, the user must have our Redamp.io app installed on the device and be signed in. Enrollment happens through that app, so this is a hard requirement.
Opening the Wizard
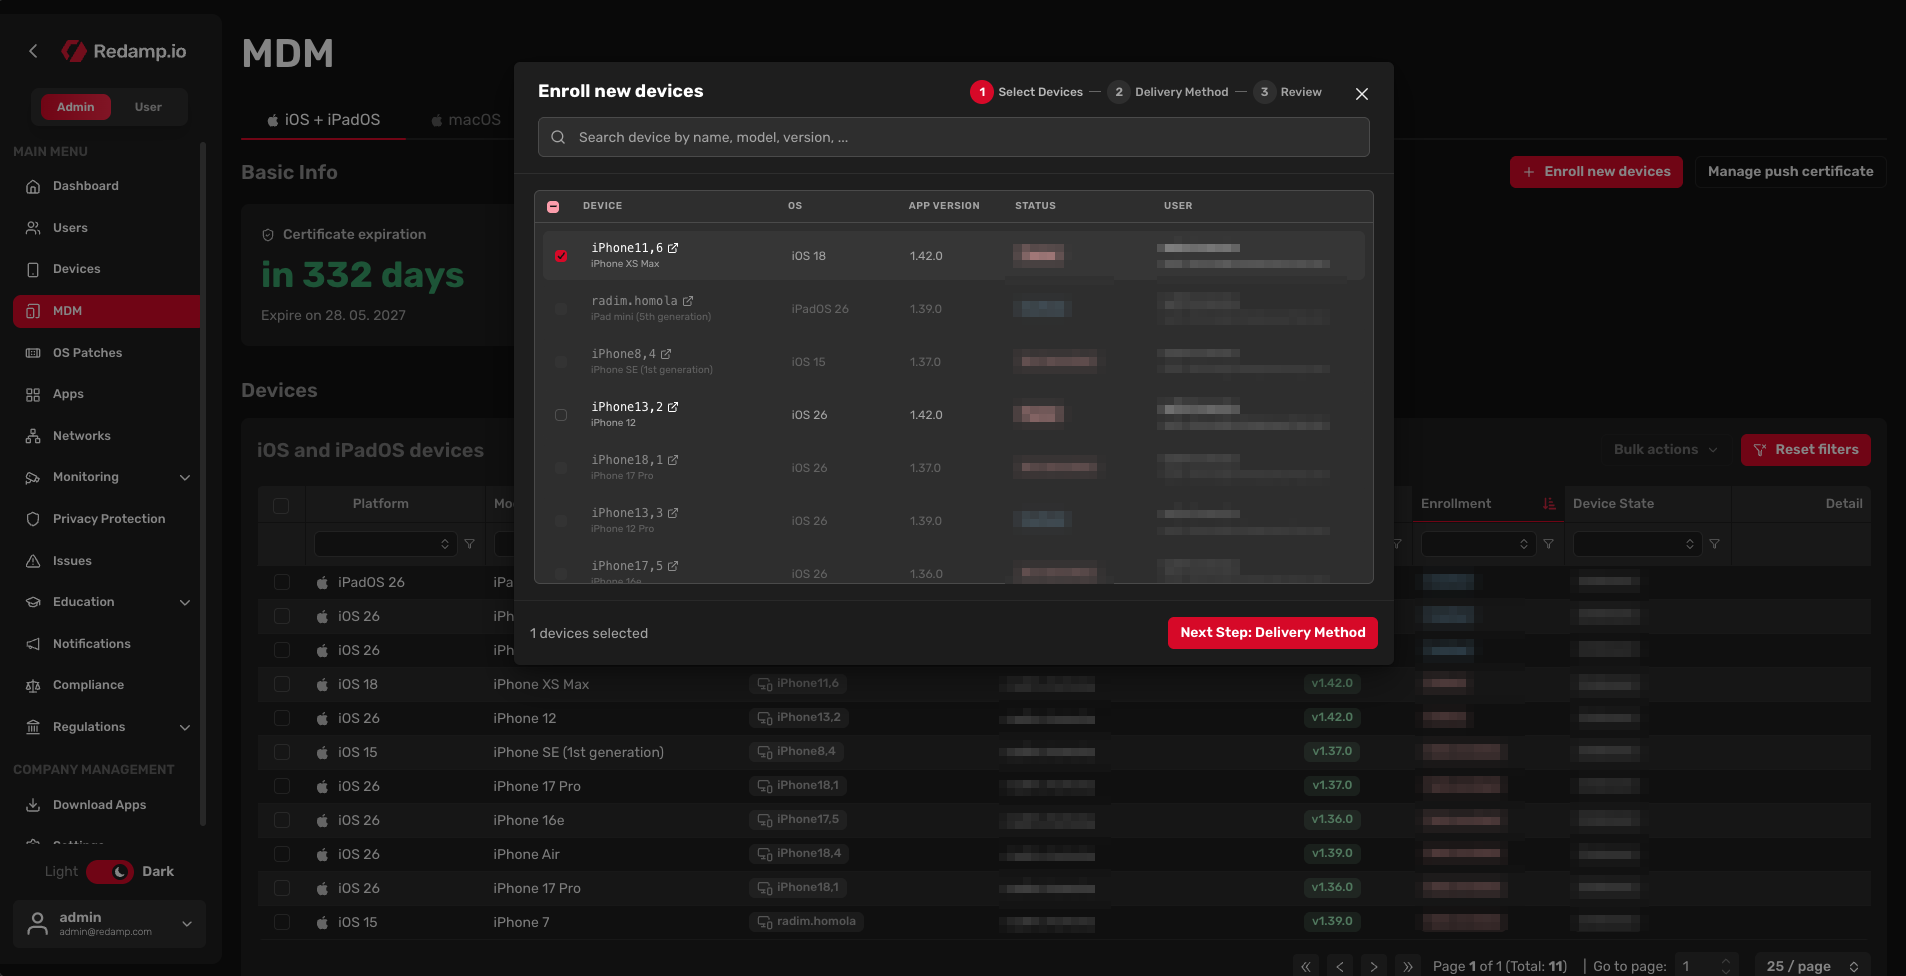
From the MDM dashboard, open the iOS / iPadOS section and click Enroll new devices. The wizard opens as a modal with three steps shown across the top: Select Devices, Delivery Method, and Review.
Step 1: Select Devices
You'll see a table of every eligible iOS / iPadOS device in your account.
Step 2: Notification Delivery Method
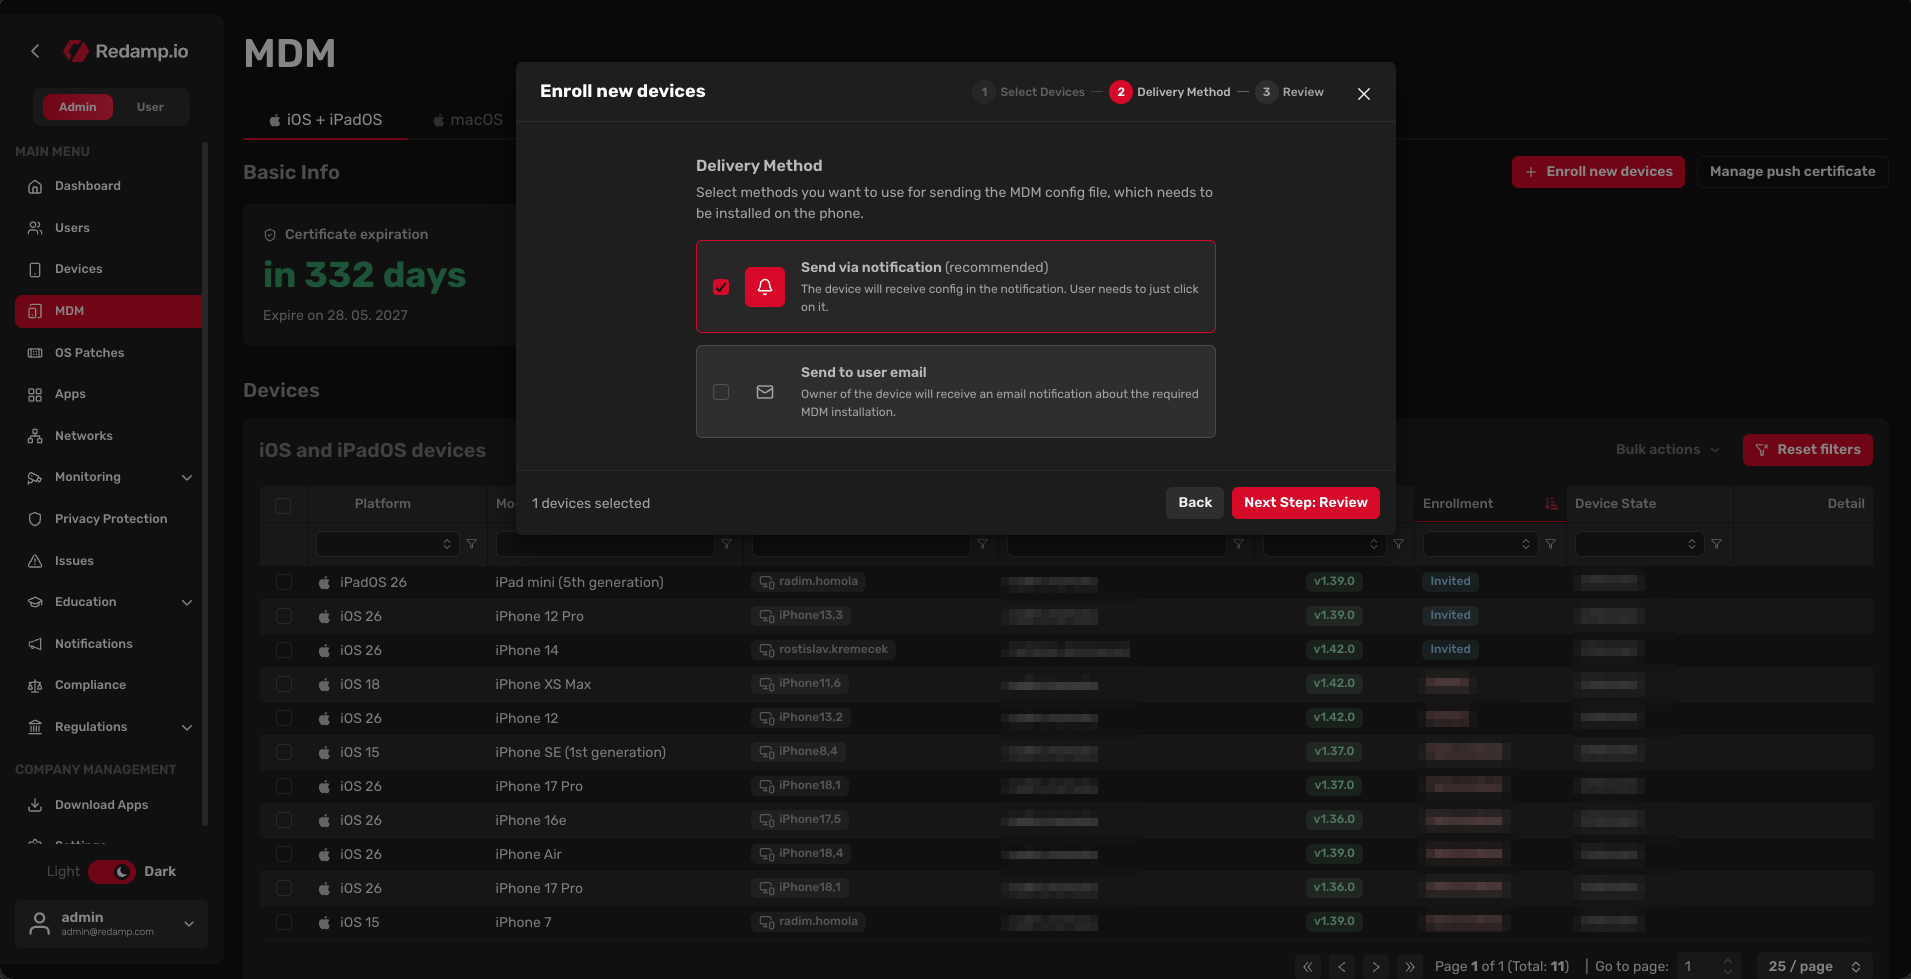
This step decides how the MDM requirement notification reaches the user. You have two checkboxes, and you can tick either or both:
- Send via notification (recommended). The device receives the notification inside a push notification. The user just taps the notification and the install flow opens automatically. This is the fastest path and the one we suggest for almost every case.
- Send to user email. The owner of the device receives an email explaining that they need to install the MDM. Useful as a fallback if push notifications are disabled, or alongside the notification as a belt-and-braces option.
Pick at least one and click Next Step: Review.
Step 3: Review
The review step gives you a final summary before anything is sent:
- A count of devices you selected (with an Edit button to jump back to Step 1).
- The delivery methods you chose (with an Edit button to jump back to Step 2).
Read it through, and when you're happy click the green Enroll devices button at the bottom right. You'll see a confirmation toast along the lines of "Enrollment requested for N device(s)" and the wizard closes.
What the User Sees on Their Device
Within a few seconds of you clicking Enroll, the user gets a push notification (and/or email, depending on what you picked). When they tap it, our app opens straight into the enrollment flow, and iOS takes over:
- Downloading the MDM configuration profile. 2. iOS prompts them to open Settings to install the profile.
- Confirming the install with their device passcode.
- Trusting the MDM source when iOS asks.
The whole thing takes about 30 seconds on their end. Once finished, the device flips to Enrolled in your MDM dashboard, and you can start pushing policies, apps, and configurations to it.
What's Next
Once your first device is enrolled, the rest gets easier. You can:
- Add more devices by repeating the notification flow.
- Create policies (passcode requirements, restrictions, Wi-Fi configurations, etc.) and assign them to devices.
- Wipe or lock lost devices remotely.
If anything in the setup gets stuck (Apple's portal can occasionally be finicky, especially around certificate generation), contact us through the contact form or email us directly at [email protected] .